Introduction
The TOCS (Tactical Operational Command System) is a double blind multi-player tactical operational level combat system that provides the framework for WWII/Korean War operational-level campaign game modules. Hereafter referred to as the TOCS WWII Rules, extend the TOCS Basic Rules to cover the time-period specific rules.
The fog of war is achieved by maintaining a perimeter boundary between opposing forces where all units remain hidden from the opponent. Only actions that affect the perimeter boundary or occur within the enemy perimeter are announced. Any action occurring within the friendly perimeter remains a secret. The result is a double-blind system that models limited intelligence with a high degree of fog of war.
Players are known as Commanding Officers and represent Corps, Divisional or Brigade commanders. The TOCS WWII rule set abstracts much of the command staff work for communications and supply, allowing the Commanding Officer to focus on issuing orders and conducting operations.
The TOCS system includes a full set of land, air and naval actions that can be performed to create battle tactics that leverage intelligence gained through reconnaissance activities and through prisoner interrogation. At best, the Commanding Officer's understanding of the enemy's disposition and intentions will be vague as he no longer has an omnipresent view of the battle space. The TOCS WWII system is unlike any other game system and comes close to accurately modeling combat during this time period and unit level.
The TOCS system has been under design since 1983 and has had several WWII modules created based on this set of rules, such as: Utah Beach, Advance to the Moselle, and Operation Market Garden — Nijmegen. Initially intended as a means to train military cadets and officers about the aspects of tactical/operational command within the battle space, but subsequently implemented as a commercial game system. The TOCS system lends itself to many different map styles allowing it to scale to battles that took place over great distances. Refer to the TOCS articles on tips on playing.
Table of Contents
- 1.0 WWII Game Concepts
- 2.0 Units
- 3.0 Stacking
- 4.0 Morale and ELR
- 5.0 Unit Degradation
- 6.0 ZOC and EZOC
- 7.0 Line Of Communications
- 8.0 Line Of Supply
- 9.0 Double-Blind Perimeters
- 10.0 Ground Actions
- 11.0 Terrain
- 12.0 Facilities
- 13.0 Environmental Conditions
- 14.0 Air Rules
- 15.0 Air Missions
- 16.0 Naval Rules
- 17.0 Naval Missions
- 18.0 National Characteristics
- 19.0 CRT Combat Resolution
1.0 WWII Game Concepts
The TOCS WWII rules apply to all game modules that are based on WWII and/or the Korean War time period. The order of precedence for rules is always:
- The Game Module Rules
- The TOCS WWII Rules
- The TOCS Basic Rules
This ensures that any rule can be superseded by the time-period or a module specific rule. Reading the TOCS Basic Rules is a prerequisite before continuing.
1.1 TOCS WWII Game Modules
Each WWII Game Module is a hybrid between a traditional virtualized board game with many aspects computerized to provide the fog of war experience. Each virtualize/computerized Game Module will include:
- Game Module Rules specific to that game
- A Secret Mission Brief for each player
- One or more scenarios with OOB
- One or more game maps
- Tables and Charts
- Counters and Markers
To be the most enjoyable (fog-of-war) experience, opposing players should not be privy to the opponents OOB or secret Mission Brief. Instead, they should rely on the Intelligence Report within their own Mission Brief, and perform intelligence gathering activities during the game.
1.2 Map Styles
The TOCS system can be based on many different map styles, such as hexagons, area zones, or point-to-point maps. The most common style is hexagon-based maps; however, this limits the battle space area, whereas area zones and point-to-point maps can span a much larger area.
The TOCS WWII hexagon map artwork within a hex is drawn in three aligned regions referred to as panels.
1.3 Scale
Hexagon-based maps are 1,200 meters per hex (roughly ¾ mile).
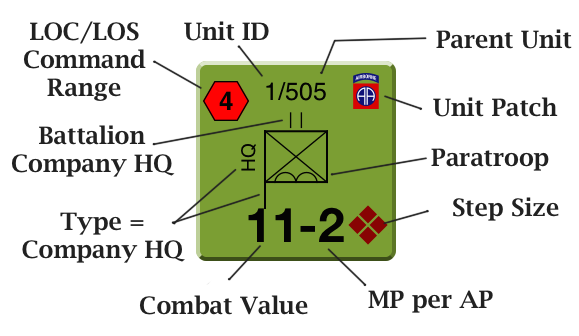
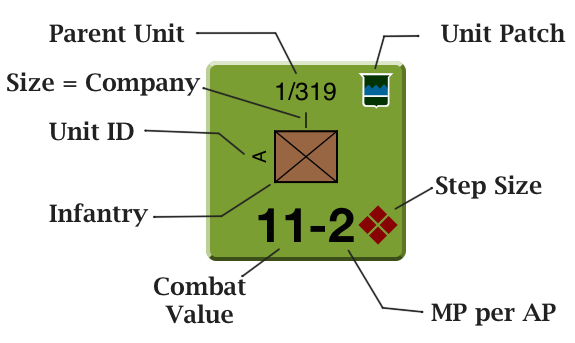
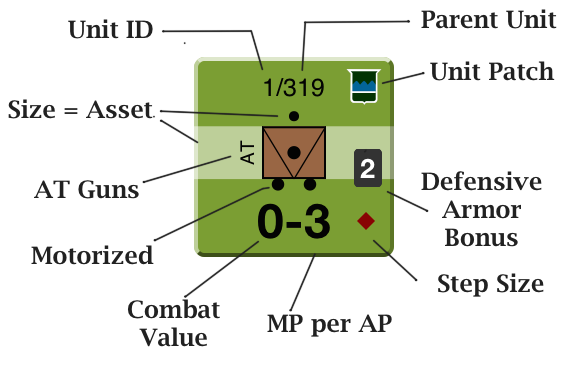
Playing pieces are referred to as either units or logistical markers. Units form the basic building blocks of all higher military formations, such as Battalions, Regiments, Brigades, Divisions and Corps. The TOCS WWII basic building blocks are Companies, Vehicle Platoons, Batteries, HQs and Assets. The TOCS WWII system highlights the capabilities of each of these unit types as well as specialized versions of these units, such as Engineering Companies and Paratroop Companies. In a similar note, reconnaissance units have special capabilities that other units do not1.
Units can take a certain number of Step Losses (SL) before they are destroyed. As an example, infantry companies represent 120 to 150 men and have four SLs, one for each platoon. Vehicle platoons will have 4 to 5 vehicles and have two SLs. Batteries will have 4 to 6 guns and 2 SLs. HQs, depending on their size, can have 1 SL to 4 SLs. Assets are small units, consisting of a few (1 to 2) vehicles or guns, or a platoon, and have only a single SL.
Game turns are 3 hours per turn unless superseded by a Game Module rule. Campaigns typically last for 3 or more days, although Game Modules can introduce ‘rest days' to extend the time frame.
1.4 Unit Stacking
Stacking within a hex is restricted to no more than four (4) Companies or Vehicle Platoons or Batteries, and/with no more than four (4) Assets. Any number of HQs can stack in a single hex.
A (non-asset) unit can have no more than four (4) Assets assigned to it. Assigned assets will move as a stack whenever the owning unit moves, and can retreat from combat as a stack. Assets cannot be assigned to other Assets.
1.5 Terrain and Movement
Units expend Movement Points (MP) to enter hexes based on the terrain types defined on the COT (Cost Of Terrain) chart. The cost is measured from the hex side crossed to the center dot of the hex entered using the lowest terrain cost. Additional costs can occur when crossing streams or when ascending a slope contour line to a higher elevation.
The defender always has the defensive benefit of the most favorable terrain DRM in the hex.
1.5.1 Rivers
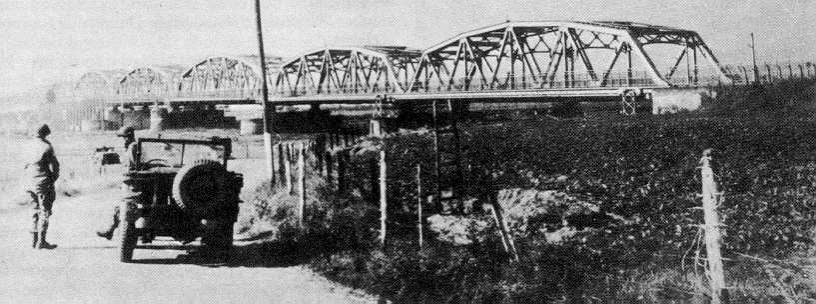
In general, rivers are within hexes and typically not along hex sides, and the river divides the hex into opposite banks. Non-amphibious units cannot cross a non-frozen/non-fordable river unless there is a bridge or functioning ferry crossing. Units in river hexes (that have no means of crossing) are marked with a River Marker to indicate what bank they are on. Battles always occur within the enemy occupied hex; therefore, if that hex contains a river/canal the defender can decide which side (or both) he is defending across regardless of how small the area in the map artwork. The defender must announce which side of the river he is on before resolving the battle.
1.6 Damage – Step Losses
When damage occurs, units are marked with (SL) Step Loss markers, which are cumulative to any existing losses. Depending on the type of unit, it may have from 1SL to 4SL before it is destroyed and removed from play. As soon as the unit receives the maximum number of hits it can sustain, the counter is moved to the dead pile for Victory Condition purposes.
1.7 ZOC, Extended ZOC, and Sticky-ZOC
The TOCS WWII system uses three variations of ZOC (Zone Of Control) to restrict enemy movement within the battle space. Only Company units exert ZOC; no other unit is capable of exerting ZOC. Non-mechanized and non-armored units cannot move directly from one ZOC hex into another ZOC hex unless performing an Infiltration. The types of ZOC are described below:
- ZOC: A Company exerts ZOC into all six adjacent hexes.
- Extended ZOC: A Company in Extended Deployment2 exerts ZOC two hexes out in front of it and has no ZOC behind it, based on the Extended Deployment marker. The first three ZOC hexes are adjacent to each other and the Company. The extended ZOC hexes are adjacent to each other and in front of the first set of hexes.
- Sticky ZOC: A mechanized or armored unit can move from ZOC hex to an adjacent ZOC hex, referred to as Sticky ZOC, at 2xCOT (Double COT).
2.0 Units
In the TOCS WWII system, military formations are organized in a command and control hierarchy represented on the Game Module OOB (Order Of Battle) as Corps, Divisions, Brigades, Regiments, and Battalions. These unit formations are represented by Game Module counters and are the lowest level of units that when combined represent the organization of parent unit. TOCS WWII system can build any unit formation from the following counter types, each having unique capabilities and are described in the subsections below:
- HQ
- Companies
- Vehicle Platoons
- Batteries
- Assets
Each game module counter (unit) will be of a specific type; such as on foot, horse drawn, cavalry, motorized, mechanized, or armored as represented by the NATO symbol on the counter artwork. Further distinction of the counter types differentiate the gun types, such as Mortars, Rockets, AT, AA, and Artillery. The following rule set often refers to a broad class of units, such as Units on Foot and Tracked/Wheeled Units.
2.1 HQ Units
Headquarters (HQ) adhere to a chain of command between military organizations, in decreasing order: Army Group, Army, Corps, Division, Brigade/Regiment, and Battalion. Refer to the OOB of the Game Module for the reporting hierarchy. The amount of damage a HQ can take:
- Battalion HQ can take 1SL
- Regiment HQ can take 2SL
- Brigade HQ can take 2SL
- Division HQ can take 3SL
- Corps HQ or higher can take 4SL
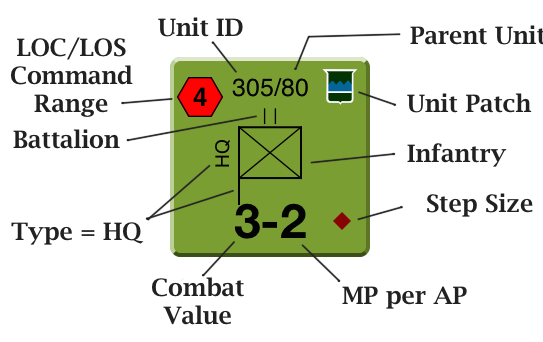
HQs have a printed LOC (Line Of Communication) Command Range that is measured in hexes. Only HQ can issue orders to subordinate units within LOC, allowing those units to perform specific actions that they would not otherwise be allowed to perform. An activated HQs can spend 1AP and order up to 3 assets to activate. Each activated asset has 3 APs. If the only actions that a HQ performs are to issue orders to subordinate units, that HQ does not degrade.
When an HQs activates, it has 3AP to spend, but the allowed actions do not have to be spent sequentially and can occur any time throughout the impulse. If they are not spent by the end of the impulse they are forfeit. Likewise, when the HQs activates up to 3 assets, the assets can activate at any time before the end of the impulse. If they are not activated by the end of the impulse, the activation is forfeit. This allows the sequencing of orders and asset activation to be very flexible, by having the right to perform these in any order throughout the length of the impulse.
HQ also acts as a LOS (Line Of Supply) so that units can trace supply back to a supply source. A HQ does not exert a ZOC (Zone Of Control) and must stop when entering an enemy ZOC.
Some nations had Battalion HQ known as a HQ-Company that consisted of the Battalion HQ and a company-strength unit amalgamated as a single unit. These units are treated as Battalion HQ for all purposes but have the additional capabilities of a Company. HQ-Companies exert ZOC, whereas HQ do not exert ZOC.
All units [EXC: Independent Units] report to their parent HQ as per the Game Module OOB, unless they have been reassigned.
2.2 Companies
Companies, depending on nationality and time period represent 90 to 150 men with weapons and vehicles/horses. The term Company refers to its size and basic capabilities. Companies can be specialized with different designations, such as: Airborne, Glider, Engineer, Bridging, Motorized, Mechanized, Cavalry, Partisan.
Regardless of type, all Companies exert a ZOC (Zone Of Control). Companies must stop when entering an enemy ZOC and non-mechanized Companies cannot move directly from one ZOC into another ZOC. Companies have 4SL.
Refer to the National Characteristics (18.0) to determine if the nations in play will have an inherent defensive AT bonus due to bazookas, panzerfausts, panzerschrek, and AT magnetic mines, if it is not already printed on the counter.
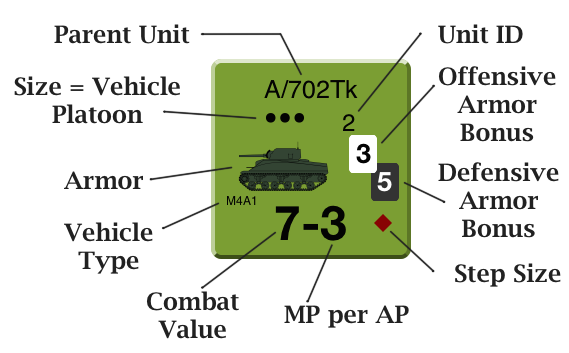
2.3 Vehicle Platoons
Vehicle Platoons represent 4 to 5 vehicles and have 2SL. Vehicle Platoons do not exert ZOC.
2.4 Batteries
Batteries consist of 4 to 6 guns and can represent AA, AT, mortars, rockets, howitzers and artillery. Batteries have 2SL and do not exert ZOC. Batteries have a printed Artillery Range that is measured in hexes. Armored SPA (Self-Propelled Artillery) is considered both Vehicle Platoons and Batteries.
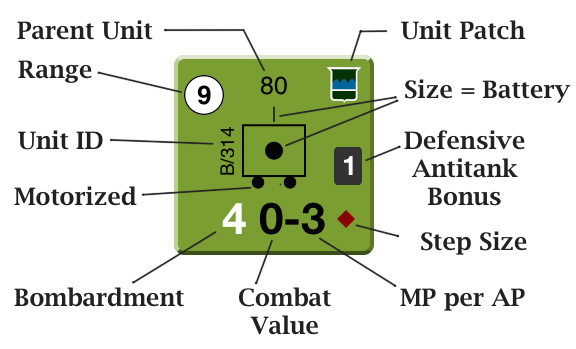
Batteries cannot fire any artillery mission out of an Engagement Battle. Batteries cannot perform Reconnaissance or Probe actions. If the Combat Value is underscored, only the defender can add the Combat Value within a battle.
Mortars fire at full Bombardment strength when called in as OBA during battles and at full strength when they are within a battle.
2.5 Assets
Assets are the smallest size units and are owned by their parent HQ and typically consist of 1 or 2 vehicles, or a platoon of infantry, or a small number of guns, and are distinguished by a band across the center of the counter. Assets have only 1 SL before they are destroyed. Assets do not exert ZOC.
When an Asset is assigned to a unit, it will stack with it and move whenever that unit moves.
Dozers, AA guns, AT guns and Artillery assets cannot perform Reconnaissance or Probe actions.
2.6 Specialized Units
Some units were uniquely specialized with advantages that others did not, such as dozers, dozer tanks, fail tanks, commandos, etc.
2.6.1 Independent Units
Autonomous formations that acted independently do not report directly to HQs in play, but can freely draw LOS from them. These units are considered to be self-sufficient and can operate independently, even behind enemy lines. Examples of independent units are commandos, rangers and advanced landing parties. The OOB can define independent units to be of any size or composition.
2.6.2 Forward Observers
Forward Observers (FO) are assets that can access artillery missions from any friendy artillery or mortar unit. FOs can be assigned to another unit as an assigned asset. FOs also act as observers when located at a higher elevation. FOs can call in Artillery Strikes and Artillery Interdiction missions at no additional AP cost by the HQ that activated and ordered the FO to perform the mission. The FO has the same capabilities that the HQ has if it had ordered the attack. A FO can also direct artillery bombardments but this must be authorized by the activated HQs spending an AP to authorize the ammunition usage. Artillery fire directed by an FO receives a bonus of the Artillery Strike and Artillery Bombardment tables. Once a FO is eliminated it is removed from play.
2.6.3 Reconnaissance Units
Reconnaissance units3 can move into an enemy occupied hex with a lower chance of being ambushed. Reconnaissance units can withdraw from combat, as attacker or defender, without requiring a MC (Morale Check) or degrading to a lower state.
Due to their higher movement point allowance, reconnaissance units typically outperform all other unit types while performing reconnaissance activities.
2.6.4 Engineering Units
Engineering units can be Companies, Vehicle Platoons, Independent Units or Assets; and have distinct capabilities4 that distinguish them from other types of units.
Engineering companies have a distinct advantage in performing the Improve Position (10.9) action. Good Order and Fatigued Engineering Companies and Good Order engineering assets can perform the Improve Position action.
Only engineering companies or engineering assets can perform the Create Minefield (10.11) or Clear Minefield (10.12) actions. Engineering units entering a known minefield do not take a morale check (MC). Specialized engineering flail, roller, or dozer vehicle platoons or assets can perform the Clear Minefield action.
Only engineering or bridging companies can perform the Construct Bridge (10.13) or Destroy Bridge (10.14) actions. Specialized Bridging Companies can construct vehicle bridges, such as a Treadway Bridge or Bailey Bridge.
Engineering companies have inherent boats/pneumatic rafts in their baggage train and can create a temporary ferry crossing (12.1) in their hex across rivers and canals. An Engineering unit starting in a river/canal hex can at no activation cost convey other units (up to 4 Steps) that start stacked in the same hex to the opposite bank.
Only engineering companies can perform the Repair Facility or Destroy Facility (10.27) action.
3.0 Stacking
Stacking is enforced for both practicalities of game play and to model the historical size of the combats during that time period. While battles may have ranged over miles involving huge number of units, individual combats within hexes must adhere to stacking limits.
Any combination of up to four (4) Companies or Vehicle Platoons or Batteries, plus up to four (4) assets, plus any number of HQs can stack in a single hex. Battalion HQ-Companies are counted as Companies for stacking purposes.
Units may temporarily over stack while moving, attacking, or withdrawing, as long as at the end of the current friendly Operational Impulse the hex is not over stacked [Exc: 3m-6m roads are so small that they prohibit use of the road if another tracked/wheeled unit is in that hex].
Units forced to retreat from combat may temporarily over stack as long as the hex is not over stacked at the end of the next friendly Operational Impulse, or the end of the game turn, whichever comes first.
Each over stacked hex must be reduced to legal stacking limits by either eliminating units (owners choice), or by moving units, or by attacking out of the hex, or by issuing a Disband action.
4.0 Morale and ELR
A unit's morale and experience indicates the level of willingness and capability of following orders and/or performing specific actions, as well as its ability to hold up under combat. Each military formation in the OOB has a Morale Level (ML) and an Experience Level Rating (ELR).
Neither the unit's ML nor ELR value is modified during the game, unless explicitly stated by a Game Module Rule. Although units may take combat losses SL that reduce its strength, the ML and ELR remain the same throughout the game regardless of the unit's current strength or degraded state.
4.1 Morale
Morale Level is an indication of the unit's willingness to follow orders and ability to withstand hardship in battle without suffering in performance and/or degradation.
When an action or order requires a unit to take a Morale Check (MC) it must make a 2d6 and apply any die roll modifiers. The resultant 2d6 must be less than or equal to the unit's ML in order to pass the MC.
4.2 ELR
The ELR represents the units training and ability to perform actions. The ELR value usually acts as a die roll modifier when performing certain actions, allowing better trained troops to be more likely to perform them, and poorly trained troops less likely.
5.0 Unit Degradation
Units degrade through a series of worsening states until all unit cohesiveness collapses5. TOCS WWII system allows Commanding Officers can continue to push units past the breaking point, which affects combat performance and their ability to perform actions and orders. Units can recovered over time until they return back to Good Order.
Units are always in one of the following states, in descending order: Good Order, Fatigued, Disordered, Disrupted, Demoralized or Dispersed (the latter are known as the four Ds).
Whenever a unit is activated [Exc: HQ that only issue orders], or is involved in combat, or attacked on a Combat Table resulting in a d or D result, or units that retreat from combat [Exc: reconnaissance units] it will degrade to a lower state. However, units performing a Withdrawal action from combat do not degrade.
Units that have degraded to the point that they have no remaining AP cannot be activated.
5.1 Good-Order State
Good Order units suffer no adverse effects and are flipped to the good order (non-red band) side of the counter.
A good order unit has 3 AP during day turns and 2 AP during night turns.
5.2 Fatigued State
Fatigued units are flipped upside down to the side with the red band around the edges of the counter.

Fatigued units have one less AP; therefore they have 2 AP during day turns and 1 AP during night turns.
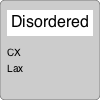
5.3 Disordered State
Disordered units are marked with a Disordered marker.
Disordered units have two less AP; therefore, they have 1 AP during day turns and no AP during night turns.
5.4 Disrupted State
Disrupted units are marked with a Disrupted marker.
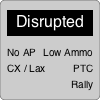
Disrupted units have no AP and cannot perform any actions other than defend if attacked.
5.5 Demoralized State
Demoralized units are marked with a Demoralized marker.
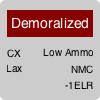
Demoralized units have no AP and cannot perform any actions other than defend if attacked.
5.6 Dispersed State
Dispersed units are marked with a Dispersed counter and represent units that have lost cohesion and have become wildly scattered or are suffering desertion/rout.
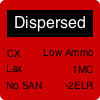
Dispersed units have no AP and cannot perform any actions other than defend if attacked. No unit can degrade past the Dispersed level.
6.0 ZOC and EZOC


The TOCS WWII's game system uses a double-blind system that allows new opportunities to utilize ZOC (Zones Of Control) and EZOC (Enemy Zone Of Control) as a tactic within the battle space fabric.
Key Concept: Either opponent can decide when a Company will exert ZOC at any time during any phase, or can decide not to declare ZOC/EZOC at all. In addition, once announced, ZOC/EZOC continues to exist even if the Company moves away, until proven that it no longer exists6.
Only friendly good order, fatigued, or disordered Companies not locked in an Engagement Battle can exert ZOC. Only enemy good order, fatigued or disordered Companies not locked in an Engagement Battle can exert EZOC. ZOC/EZOC never extends into or out of an Engagement Battle hex. ZOC/EZOC extends one hex in all directions into adjacent hexes that the Company could have moved directly into; but does not extend beyond the far bank of a river, unless it either is fordable, bridged or frozen or is a functioning ferry site.
6.1 Effects during Movement
Friendly ZOC has no effect on friendly movement. EZOC remains in effect regardless if there are still enemy units capable to exerting it, until the EZOC is proven to not exist through movement or reconnaissance.
Whenever a unit moves or performs reconnaissance into a hex with EZOC the opponent must announce whether it still exists, and whether the hex is empty or enemy occupied. The EZOC exists only if there is a Company within range and capable of exerting it. If the EZOC still exists the moving unit must stop ending that action and forfeiting any remaining MP of that action. The unit may still spend any remaining AP.
Non-mechanized/non-armored units are prohibited from moving from one EZOC hex directly into another adjacent EZOC hex7 unless they had performed an Infiltration action. Mechanized and armored units that enter a EZOC hex can continue into another EZOC hex by paying 2xCOT (Double Cost Of Terrain) as long as they have sufficient MP to enter that hex.
Units in Extended Deployment (10.15) cannot project their extended EZOC into an enemy occupied hex, or through an adjacent enemy occupied hex.
Units in Extended Deployment have a ZOC/EZOC that extends two hexes deep in the three front hexes and has no ZOC/EZOC in the three hexes behind it, based on the extended deployment marker's direction. When moving units enter into an extended deployment EZOC hex they are forced to stop; however, the hex is not considered to be EZOC during the next Operational Impulse and the unit is not held by the EZOC-to-EZOC rules. The 1st line of extended deployment EZOC hexes can be thought of as ‘sticky' EZOCs, which are negated on the next impulse after a unit moves into and remains in them.
Example 1:
An enemy company in Extended Deployment will place EZOC in the three adjacent hexes in front of it, and its extended EZOC into the three hexes in front of those hexes, which makes a 6 hex EZOC region two hexes deep. If a Company moves into an outer extended EZOC hex, the enemy will announce the hex is in EZOC, causing the moving unit to forfeit any remaining MP of that AP. That unit will be blocked if it tries to move directly into another EZOC hex; again forfeiting it's AP. The extended EZOC remains in force until the end of the Operational Impulse when extended EZOC cannot extend into enemy occupied hexes.
Example 2:
Based on the above example, the phasing player now spends the Company's last AP to perform Reconnaissance into two adjacent hexes to determine if they are enemy occupied and when he learns they are not, realizes he has encountered a Company in extended deployment. He then activates an armored vehicle platoon and drives it into the extended EZOC hex with the Company and then pays 2xCOT to enter the adjacent recon'ed hex. Now that there is a friendly occupied hex between the unit exerting EZOC and the extended EZOC hex, it is immediately removed. If the vehicle platoon had additional AP, it could perform reconnaissance on adjacent hexes to determine which are enemy occupied.
Example 3:
The phasing player can now activate other units and freely move them through the removed extended EZOC hex and into any adjacent hex. If the vehicle platoon had identified the enemy occupied hex, a Hasty Attack could be launched, with the aim to lock the enemy Company within an Engagement Battle, which would eliminate its ability to throw any EZOC.
6.2 Effects during Combat
ZOC/EZOC have no effect during the resolution of a battle on the CRT, including any resulting retreats and possible pursuits and exploitations. After the combat has completed, all ZOC/EZOC are back in effect. Companies locked within an Engagement Battle are incapable of exerting ZOC/EZOC.
7.0 Line Of Communications
All units, except Independent Units, must adhere to a LOC to their parent HQ or a higher-level HQ of their parent formations. The LOC can be accomplished overland based on the command radius (measured in hexes) printed on the HQ counters, or by wireless radio8. The LOC rules abstract the work performed by the command staff, allowing the Commanding Officer to focus on conducting the battle.
Example:
A company can be in LOC if it can trace a route to its Battalion HQ, or the Battalion's Regimental HQ, or the Regiment's Divisional HQ.
Units that are out of LOC are hindered by having one (1) less AP, and are restricted from performing some types of actions, and cannot perform any action requiring orders9.
A unit out of LOC cannot receive Artillery Support while attacking or defending, as the LOC chain between the Unit-HQ-Battery must all be in LOC.
Independent units are immune to LOC penalties.
7.1 Overland LOC
A unit traces overland LOC in hexes that it could legally move through to a parent HQs of its formation's organization, that fall within the command radius of that HQ. In other words, a HQ with a command radius of 4 hexes will keep all subordinate units in LOC as long as they can legally move through those hexes.
Overland LOC cannot be traced through enemy hexes whether occupied or not, nor can it be traced through an Engagement Battle but units within an Engagement Battle can trace LOC out of an Engagement Battle, nor can LOC be traced through impassible terrain, nor through EZOC unless a friendly unit occupies that EZOC'ed hex.
Overland LOC cannot be traced across rivers unless they are bridged, fordable, frozen, or have a functioning ferry site.
7.2 Wireless LOC
Wireless communications utilizes a line of sight route between the unit and a parent HQ, is measured in hexes that are traced from center to center of both hexes. Wireless communications allows units to stay in LOC when overland communications routes are not possible.
Full height intervening objects that are higher than the base level of both units reduces the wireless communications range by one hex for each blocking obstacle. Examples of such full hex intervening objects are hills, woods/forest, jungle, and cities/suburbs/towns. Units on hills are assumed to be one level higher for each crest line. Units in cities and suburbs are assumed to be one level higher to account for operating radios from upper levels and rooftops.
For purposes of HQ issuing orders to units, any combination of wireless ‘hops' can be made between the HQ issuing the order and the unit receiving the order, as long as all HQ ‘hops' are made within the same parent/subordinate formation.
Example:
A Battalion HQ can issue orders to one of its Companies that is beyond the HQ's wireless range, by using its own Regimental or Divisional HQ as a repeater, assuming that they are within wireless range.
Example:
A Division can issue an order to a unit that is beyond its overland or wireless LOC range, by using the unit's Regiment HQ and then the Battalion HQ as repeaters to ‘hop' the message over to the unit. When planned properly the wireless network becomes a meshed network with multiple redundant paths between endpoints. Advanced wireless communications was one of the many tactical advantages of the WWII time period, as especially demonstrated by the US Army's Artillery.
8.0 Line Of Supply
Supplies are consumable commodities such as victuals, ammunition, weapons, oil, gasoline, medical supplies and all other items that an Army needs to fight, such as bridging equipment, mines, wire, and replacement parts. The supply chain ensures that the Army has supplies in stock when it needs to fight, and has what it needs to fight with.
All units, except Independent Units must be able to trace an overland LOS (Line of Supply) to a supply source. Those that cannot, are considered to be Out Of Supply and penalized in combat and the actions they are allowed to perform, and are marked with a Out Of Supply marker.
8.1 Supply Sources
Supply must eventually be traced back to a Supply Base, Supply Dump, Supply Depot, or a Mobile Supply Depot within the friendly perimeter. The difference is their size and whether they are a fixed position facility that might be known to enemy intelligence, or smaller fixed site facilities that the enemy is unaware of. A Mobile Supply Depot is transported or delivered by truck, aircraft, ship or boat, and can enter as reinforcements and can move supplies from one fixed facility to another.
Example:
In order to keep forces supplied after a breakthrough of the enemy lines, several Mobile Supply Depots can be created and assigned to units (as if they were assets), so that they travel with the advancing units.
Example:
Units that are cut off from their LOS can request that an Airborne Supply Mission deliver supplies into the isolated pocket. These can arrive by parachute, glider or by air transport to an airfield. Once supplies are delivered Mobile Supply Depot markers represent them.
8.1.1 Supply Bases, Dumps and Depots
All are fixed site non-movable facilities that are staging areas for supplies. The largest supply source is a Supply Base. Both sides due to prolonged aerial reconnaissance know the location of Supply Bases.
Next in size is a Supply Dump whose location is assigned during scenario setup by the owning player and its location remains secret until it is discovered during play.
A Supply Depot is a secret staging area that must be created during play, typically as an order within the Mission Command Brief. This limits the number of Mobile Supply Depots counters in place and forces Commanding Officers to set up non-movable Supply Depots instead of keeping them in trucks. It also means that the Mobile Supply Depot trucks are used to redistribute supplies between supply sources, and to project supplies forward to keep up with advancing troops.
A supply base/dump/depot that becomes enemy occupied [EXC: not in an Engagement Battle] is considered destroyed or captured. If captured the counter belongs to the opponent who had captured it. Remove it from the previous owners map and place in the same hex on the new owners map. A supply source can be captured or destroyed at the 'capturing' player's descretion.
The actual facility itself is also subject to damage that cannot be repaired during the campaign. This will be described later in the Facilities section of the rules (12.7).
8.1.2 Mobile Supply Depots
Whereas all other supply sources are fixed position installations/facilities that can never move, although the supplies within them can be moved. A Mobile Supply Depot is a truck convoy loaded with supplies and uses the motorized COT movement costs.

Supplies can be transferred between bases/dumps/depots at the cost of 1 Operational Point (OP) by creating a mobile supply depot containing up to 4 SP and then moving it. This cost represents the logistical effort in transferring large amounts of supplies. Once the Mobile Supply Depot unit reaches the distination, the SPs are transferred to that facility.
Mobile Supply Depot units have no defensive strength and are destroyed or captured at the enemy's discretion. If captured, change the counter to the opposing (Axis/Allied) nationality. When stacked with another unit that it had been assigned to, it will suffer then same fate as the assigned unit. If the unit suffers a SL, the Mobile Supply Depot SP will be reduced by 25% FRD (Fractions Rounded Down).
If attacked by artillery or aircraft, the Mobile Supply Depot can be hit by random selection.
8.2 Tracing Supply
Supply is checked at the start of the players Operational Impulse. Units that are out of LOS are marked with a “Out of LOS” counter. Any time during the Game Turn if the unit regains LOS, it no longer suffers any adverse effect of being out of LOS and the marker is removed.
All units can trace supply overland directly to a Supply Base, Dump or Depot that is within range as long as the unit could legally move through those hexes. The range radiating from the supply source is defined by the SR# in the WWII National Characteristics (18.0) and is based on the availability of transport vehicles. All units within that range are automatically in supply as long as the route within the area could be legally traversed.
Units can also trace supply overland through a parent HQ, or a chain of parent HQ of that organization based on the printed command range of that HQ, as long as the unit could legally move through those hexes, and as long as that HQ can trace to either another HQ that eventually traces to a Supply Base, Dump, or Depot.
LOS can be traced out of an Engagement Battle, but cannot be traced through an engagement battle. LOS cannot be traced through the enemy perimeter, or through an EZOC unless a friendly unit occupies that hex.
Units cannot trace LOS across non-frozen water obstacles except at fords, bridges and functioning ferry sites.
8.3 Reinforcements and Supply
Units that enter the map board from an edge can trace supply to that map board edge as if it were a Supply Base but will still draw down supply at the end of the day during the 2100 turn. In order to avoid using HQ units to create a LOS chain, players should bring supplies on as reinforcements as Mobile Supply Depots, thus freeing the HQ units to act as HQs.
Paratroopers, glider troops, seaborne assault troops and amphibious landings are always in supply for the first three game turns, before they need to trace to a LOS source.
8.4 Effects of being Out of LOS
Units that are out of LOS have the following disadvantages:
- Units have one less AP
- Some actions are prohibited
- Attacking units are at ½ strength FRU
8.5 Drawing Down Supply
During the end of each day, at the conclusion of the 2100 hours turn, each Division HQ, Regiment HQ, Brigade HQ, and KG HQ (in LOS) will deplete (draw down) the nearest supply source by one Supply Point (SP). Any supply base/dump/depot that has dropped to zero SP cannot act as a source of LOS.
The rules for tracing LOS are also used when drawing down supply. Formations that fail to draw supply directly through a supply source, or a parent HQs will have their units marked as being out of LOS.
9.0 Double-Blind Perimeters
The TOCS WWII system utilizes a double-blind system consisting of two instances of the Game Module map regardless of what format it is in, be it physical or virtual. Each player sees only the counters for their side and never sees the opponent's counters. For physical versions of Game Modules, there would be two physical maps one for each opponent, which could be set up behind a blind, but just as easily could be set up in different geographical areas. Since the TOCS WWII system is so easy to play by phone, having the maps in different areas has advantages. This is because so few units actually affect the perimeter during any single Operational Impulse, making the double-blind aspects very manageable.
9.1 Friendly and Enemy Perimeters
A perimeter delineates the boundary between opposing forces in a Game Module. To the phasing player, all friendly units must be within their friendly perimeter, while enemy units are outside the perimeter within the enemy perimeter. More than one perimeter can exist, such as the creation of pockets.
Since TOCS WWII is a double-blind system, the perimeter on both maps should be the same, meaning that each hex must be owned by one of the players.
Key Concept: It is important that every hex be ‘owned' by a single player and that each player knows who that is. When modifying the perimeter each play must adjust the boundary on their map in the same way. Sloppy perimeter adjustments can lead to misunderstanding later, so it is important to keep the perimeter in sync on both maps. When in doubt ask the other player who owns the hex.
9.2 Modifying the Perimeter
Actions that alter the perimeter must be announced so that the opposing player can adjust the perimeter markers on their map if needed. Actions such as Reconnaissance, Probe, Move, Attack, Infiltrate,
Actions that occur within the friendly perimeter do not have to be announced; whereas, all actions outside the friendly perimeter must be announced10.
Key Concept: It is important to announce actions that can modify the enemy perimeter so that both maps can be accurately updated. It is equally important not to over communicate the activities occurring within the friendly perimeter that the opponent should not be privy too. Therefore, within the friendly perimeter, players have the right to remain silent; however, whether they have the ability is another thing.
Companies, Vehicle Platoons, HQ and reconnaissance Assets can move into the enemy perimeter.
Batteries are prohibited from moving into the enemy perimeter11. Assets [EXC: Reconnaissance assets] and Mobile Supply Bases are prohibited from entering the enemy perimeter unless assigned and stacked with a unit that can.
Hexes that are Engagement battles remain owned by the defender not the attacker.
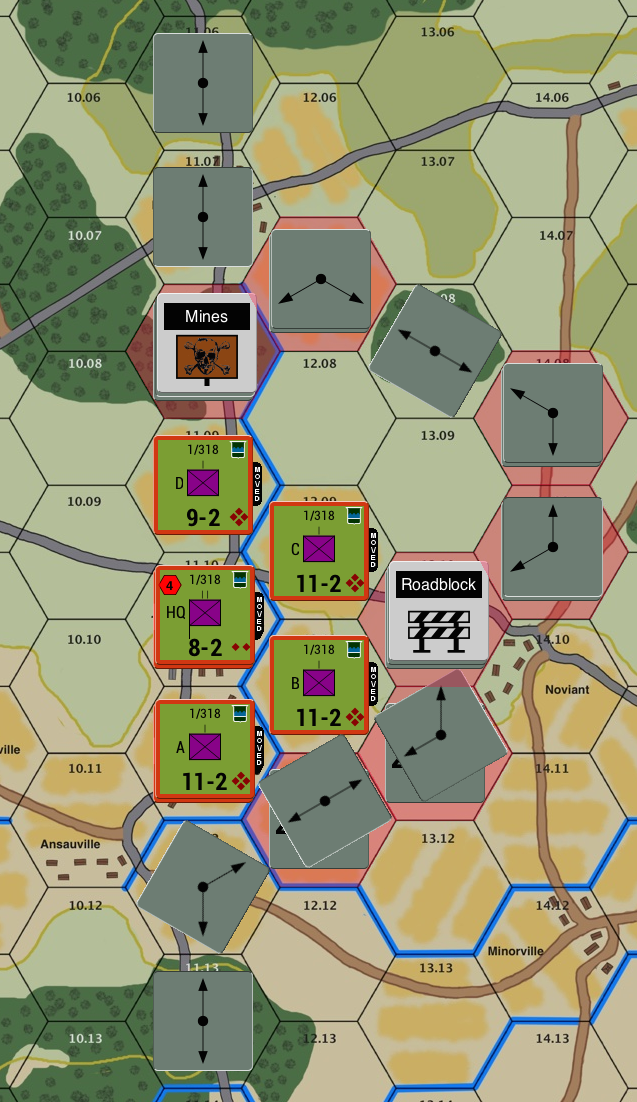
Example:
The American Commanding Officer has pushed the 1st Battalion of the 318th Infantry Regiment into the German perimeter creating the bulge seen above. The American's counters are now Fatigued after having performed all their actions. While they were performing reconnaissance the minefield in hex 11.08 and the roadblock in hex 13.10 were discovered. The hexes in pink are in EZOC that the opposing Commanding Officer announced; therefore, remaining part of the enemy perimeter. During recon of hexes 12.08 and 13.09 the enemy did not declare them to be in EZOC and since they were empty they became part of the Allied perimeter. Based on the location of the EZOCed hexes and the fact that only Infantry, Mechanized Infantry or an Engineering Company is capable of exerting EZOC that he is up against at least four German Companies, where two of them are most likely located in hexes 11.07, 14.10. The American is in a strong position because the minefield and roadblock help him by negating the roads as much as they do the German Commanding Officer. The American Commanding Officer can start ‘planning the battle' now that he has located the enemy line.
10.0 Ground Actions
TOCS WWII system has an extensive array of ground actions to perform a wide variety of battlefield activities. Only units that have been activated by spending OPs can perform actions and only if that unit has remaining APs at its disposal. Units cannot perform an action that exceeds the number of APs they have available.
Units are activated one at a time, and must spend their AP performing actions before the next unit can be activated. Therefore, activations are sequential until all available OPs are spent or banked.
Some actions can only be performed if an activated HQ (from that or a parent formation) within LOC issues an order to that unit.
Units will degrade after performing actions [EXC: Withdrawal, HQ only issuing orders]. HQ units do not degrade if they only issue orders and do not perform any actions themself.
Actions can be performed in any sequence, such as Move, Reconnaissance, and then Hasty Attack. An activation that will include an attack action must be the last AP(s) spent.
10.1 Move
An activated unit capable of spending AP can move along with assigned assets stacked with it up to its full movement based on the COT for each hex entered. If the move actions are sequential the MP allowance is totaled. The movement costs will be based on the type of unit being moved, where the cost of terrain is listed in the column for that unit type on the COT chart.
Environmental conditions can affect movement costs and are described in the section of Weather (13.0).
Units on foot and armor and mechanized units that spend the entire AP moving along a road receive an additional 1 hex road bonus after each AP is spent, as long as all MP are spent using the road rate COT. The unit is always considered moving in column (units on foot) or convoy (armored units) for ambush purposes.
A unit can never move out of an Engagement Battle hex, instead it must Withdraw (10.3) from it. A unit can move directly into an Engagement Battle hex, but it must stop and become part of that battle. Place the unit beneath the Engagement Battle marker. This action should remain secret and not be announced.
A unit that moves outside of its own friendly perimeter must announce the hex entered. A unit moving within its own friendly perimeter never announces it is moving, unless moving through an area under enemy Aerial Observation (15.3).
10.1.1 Bypass Movement
Bypass movement cannot be used to enter the enemy perimeter; it can only be used with the friendly perimeter. Bypass movement is used to traverse around higher COT within a hex by traveling along one or two adjacent hex sides to reach an intended adjacent hex. The bypass MP cost is based on the terrain along the hex sides and not to the center of the bypassed hex. To enter the intended adjacent to the bypassed hex will cost the full COT to the hex center.
The unit must have enough movement points to enter the intended hex, or the move is invalid. There must be enough space between the hex-side bypassed and the inherent terrain artwork for a counter to fit on edge, for the hex to be considered bypass-able. If the hex cannot be bypassed, the unit either remains in the current hex and the MP are forfeit, or if it has enough MP it may enter the hex.
Bypass Movement cannot be used in jungle, forest, bocage or city hexes.
10.1.2 Ambush during Movement
Any unit performing a Move action that enters an enemy occupied hex is immediately ambushed and is immediately resolved on the CRT (0) before any other play continues. The unit that was ambushed forfeits any remaining AP it has.
No indirect artillery or aircraft on either side are involved in determining the odds or the column shifts. The defender gains a two-column shift advantage against ambushed units. If the ambushed using road rate the attackers strength is ½ FRU due to being in column or convoy. Once the ambush battle is resolved play continues normally.
10.1.3 Straying during Movement
There are several occasions that cause troops to become disoriented when performing a Move action that results in straying, such as movement from bocage, forest, jungle, or at night, or due to environmental conditions, unless the unit is following a road, railroad, stream, canal, river or coastline. Refer and resolve on the Straying Table.
Units that move are subject to straying only for the first hex moved into; thereafter, the unit is no longer subject to straying and can move normally. Roll a 2d6 and apply all DRMs to determine if the unit strays. If the unit strays roll a d6 to determine in which adjacent hex the unit strays into. If that hex is a map edge, or impassable, or there are not enough MPs to reach it using all AP, the unit remains in the present hex. Each unit exiting by a different direction will roll for straying when they activate.
Several factors minimize straying, such as the other units it may be stacked with and whether friendly units are adjacent. In addition, the unit's training, based on it's ELR (Experience Level Rating) can minimize straying. Straying only affects the first unit activating as long as all other units follow the same path. If the straying unit enters into an enemy unoccupied hex, the hex become friendly owned and the perimeter markers are updated. If the straying unit enters an enemy occupied hex, an immediate Ambush Battle occurs. If the straying unit enters and Engagement Battle, the unit is placed under the Engagement Battle marker and becomes part of that battle.
10.1.4 Mechanical Reliability
Check the National Characteristics (18.0) of the nations in play to determine if their vehicles are affected by mechanical reliability, which can occur due to design issues, temperature, terrain, or inadequate ability to keep them repaired.
Axis forces prior to October 1941 suffered from mechanical reliability due to the heat and dust while fighting in the deserts in North Africa. All tracked/wheeled units will degrade a second level each time they move using all their MP to move (10.1).
10.2 Infiltration
An activated HQ can spend 1 AP to order a good order subordinate Company12 in LOC to activate and spend all of its AP to perform an infiltration from a hex in EZOC into an adjacent enemy owned hex
Infiltrations are never announced until the start of the Resolve Combat Phase, which means the enemy does not have the opportunity to react to it in the Reserve Units Commitment Phase.
If the hex is empty the unit moves into it and the perimeter is adjusted on both maps to be friendly owned. If the hex is enemy occupied the unit infiltrating will lead the battle. The infiltration must be the first ground unit attacking the hex and other units that are attacking will be delayed 1AP to allow time for the infiltration itself.
Key Concept: The infiltration attack must be ordered and allows the Commanding Officer to launch an attack from an adjacent hex and not give the enemy the opportunity react with units in reserve. In effect a successful infiltration attack is a sudden surprise for the defender, but if it was detected can actually put the attacker in a worse predicament.
A 2d6 is made to determine whether the infiltration is successful by comparing the value rolled against the Infiltration Table and applying all DRMs that apply. In general, experienced (ELR) and motivated troops (ML) should surprise a poorly trained unmotivated enemy, and night visibility and weather conditions can modify the attacker's probability of success.
The combat column shift goes to the attacker if successful and goes to the defender if unsuccessful.
10.3 Withdrawal
An activated parent HQ can order one or more subordinate units in LOC to withdraw from an Engagement Battle hex to adjacent hexes, if the unit successfully passes a MC. If a unit has assigned assets stacked with it, they may retreat with it, but must withdraw with the unit it is assigned to and stacked with. Unassigned assets must pass their own MC in order to withdraw.
Units are retreated one at a time after passing their MC and then spending an OP to activate. Reconnaissance units and armored units do not take MCs before withdrawing. The withdrawal action consumes all of the retreating units AP, but the unit does not degrade. Failing the MC has no detrimental effects, other then the HQ would need to spend another action to issue the order again. Regardless of success or failure, neither the units nor the HQs will degrade after withdrawing.
EZOC has no effect on units that are withdrawing. If the engagement battle hex is vacated, the hex will immediately become enemy occupied and must be announced. Units that withdraw from one engagement battle directly into another engagement battle are done in secret. Units that withdraw into the friendly perimeter are done in secret. Units withdrawing into hexes within the enemy perimeter are always announced as each unit (stack) withdraws. If the enemy hex is empty it immediately becomes a friendly occupied hex. Units withdrawing into enemy occupied hexes are immediately destroyed and removed from play.
10.4 Reconnaissance
An activated (Company, HQ, Vehicle Platoon, armored or reconnaissance asset) unit spends 1AP to project reconnaissance into a chain of adjacent hexes. The unit must pay the full non-road-rate COT movement cost to reach the center of the hex without using roads, but can use roads and bridges to cross the hex-sides or rivers. Reconnaissance cannot be performed if the hex could not be legally entered using a Move action.
Reconnaissance is an intelligence gathering activity that provides the means to determine whether a hex within the enemy perimeter either empty or enemy occupied, and at the opponent's discretion whether it is in EZOC.
Key Concept (Revealing Information): It is important to announce only that the hex is empty or occupied and not divulge additional information, other than whether it is currently being EZOCed. All ‘fixed' position attributes of the hex must be announced, such as bridges that have been destroyed, built or repaired, as well as any defensive improvements made to the hex. Facilities are also announced as these can become captured if occupied by the enemy.
Reconnaissance will discover the presence of minefields, roadblocks, improved positions, facilities, destroyed or newly built/repaired bridges, and enemy units but not their strength or composition. Reconnaissance will discover minefields and roadblocks in empty hexes13, but these do not block further reconnaissance. Enemy EZOC does not block reconnaissance; however, reconnaissance can never penetrate through an enemy occupied hex.
Key Concept (Performing Reconnaissance): Units performing reconnaissance remain stationary and do not move from the hex they are in, but project reconnaissance patrol activities out into adjacent hexes. Units performing reconnaissance ignore EZOC and therefore can penetrate through EZOC-to-EZOC hexes, but cannot penetrate through enemy occupied hexes. Reconnaissance is performed on a chain of adjacent hexes where each new hex must be adjacent to the previous hex. Multiple back-to-back reconnaissance actions can be combined to keep the previous chain going. Reconnaissance does not occupy the hexes and therefore cannot capture hexes containing facilities.
During the reconnaissance process the phasing player announces the hexes sequentially and the non-phasing player announces the state that the hexes are in. Hexes that are empty and not in EZOC immediately become part of the friendly perimeter as long as they connect to the friendly perimeter. Empty hexes that are in EZOC remain owned by the enemy perimeter. The opposing player must announce hexes that are enemy occupied. Therefore, only empty hexes not in EZOC will change the perimeter.
If the hex will be attacked, the phasing player will secretly mark the hex with a Recon marker as a reminder to apply the CRT column shift.
Key Concept (Reconnaissance in Battles): Performing either a reconnaissance or a probe will enforce a sequential time-continuum rule to ensure that the ‘combat' occurs after the reconnaissance or probe action has completed, if units entering that combat had performed the Recon action and the phasing player wants to claim the CRT column shift. In effect all higher level Intensive/Deliberate Attacks will be reduce to the same attack level of the lowest unit that had performed the reconnaissance or probe action.
Combat always uses sequential-time continuum, so that reconnaissance does not occur after the battle has started. Any unit performing reconnaissance that becomes part of the battle will dictate the length of the battle based on the AP remaining of that unit. Combat duration occurs after the AP is spent, regardless of what other units spend14.
10.5 Probe
A probe is an aggressive reconnaissance action against an adjacent hex to determine the enemy disposition as to composition, size and whether the area has Improved Positions, minefields, roadblocks, destroyed-repaired-built bridges and facilities. A probe is similar to a Reconnaissance except it can be conducted against only a single adjacent hex per AP spent.
An activated (Company, HQ, Vehicle Platoon, armored asset or recon asset) unit spends 1 AP and announces that a probe has been launched into a single adjacent enemy hex. The opponent must announce whether the hex is empty, occupied or in EZOC. If occupied, the non-phasing player discloses the type of units that occupy the hex, but not the specifics as to their strength or formation.
Key Concept (Probe): A probe differs from reconnaissance in that it is a planned intelligence gathering activity designed to learn more that can be accomplished in a quick reconnaissance action. The probe is applied to a single adjacent hex and will discover the same information as a reconnaissance action, plus the unit composition of an enemy occupied hex, but not the strength or number of enemy units present. The probe action provides an additional CRT DRM to be applied to the battle resolution. If a probe was applied to an enemy empty hex, like reconnaissance it will become friendly unless it is actively being EZOCed.
The types announced are Infantry (Company, HQ), Vehicles (Vehicle Platoon, armored assets), and Guns (Batteries, gun/mortar assets or anything towed). In the case of armored infantry (Panzergrenadier/Mechanized-Infantry/Motorized-Infantry) both Infantry and Vehicles are reported.
Combat always uses a sequential time continuum. Any unit performing a Probe that becomes part of the battle will dictate the length of the battle based on the AP remaining of that unit. Combat duration occurs after the AP is spent, regardless of what other units spend.
10.6 Intensive Attack
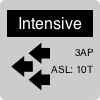
An activated unit spending 3 AP can launch an intensive attack into an adjacent hex. Any number or type of activated units can be included in the attack up to the stacking limit, but at least one of those units must have a positive, non-zero attack strength on their TOCS WWII counter.
During the Combat Resolution Phase if the hex is enemy occupied the battle is resolved on the CRT. If the hex is empty the unit moves into that hex. The units degrade after the combat (or move) is resolved.
10.7 Deliberate Attack

An activated unit spending 2 AP can launch a deliberate attack into an adjacent enemy hex. A deliberate attack is the same as an intensive attack, except in duration. The deliberate attack action must be the last action performed (last 2 AP spent).
During the Combat Resolution Phase if the hex was empty the units involved in the combat move into the hex. The units involved will degrade.
10.8 Hasty Attack
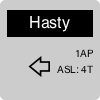
An activated unit spending 1 AP can launch a hasty attack into an adjacent enemy hex. A hasty attack is the same as a deliberate attack, except in duration. The hasty attack action must be the last action performed (last AP spent).
During the Combat Resolution Phase if the hex was empty the units involved in the combat move into the hex. The units involved will degrade.
10.9 Improve Position
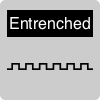
A good-order activated Company spending all of its AP can improve their position; afterwards the Company degrades. Companies that are deployed into half-companies can still improve positions.
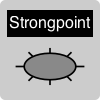
A unit can only improved a hex one level per game turn. Subsequent efforts create entrenched, then a strongpoint, and finally a fortified area. Each improved position provides additional combat strength points on the CRT. Each company under an entrenched improvement adds +2 on the CRT. Each company under a strongpoint improvement adds +4 on the CRT. Each company under a fortified area improvement adds +6 on the CRT.
Key Concept: Digging in was an important battlefield tactic as it adds a significant amount to the defenders strength. Each company beneath an improved position marker will benefit by the added strength bonus. Two companies, one beneath a Strongpoint and the other beneath a Fortified Area will add (4 + 6) for a total of 10 strength points to their defense regardless of the strength printed on their counters or the number of Step Losses they currently have. So digging in is an integral part of defense.
Improved positions are marked with an appropriate marker and are only available as long as the hex remains friendly. If the hex becomes enemy occupied the marker is removed and the fortifications are immediately lost, even if a friendly unit reenters the hex.
TOCS WWII Module rules can declare hexes to already contain improved positions, or provide a number of points that can be spent on improving hexes as part of the game setup.
10.10 Create Roadblock

A good-order Company or Engineering Platoon spending 1AP can create a roadblock in its own hex or an adjacent hex within the friendly perimeter. Roadblocks can never be created or removed from within an engagement battle hex, or a hex that the unit could not move to. Once created, place a roadblock counter secretly in that hex.
Roadblocks have no affect on units performing reconnaissance or probe, although both reconnaissance and probe actions will discover the roadblock within empty hexes. Roadblocks provide no combat advantage in battles, other than to deny the road-rate for a moving unit that is about to be ambushed.
Roadblocks always inhibit road movement into a hex, never exiting the hex. If a unit enters a hex containing a roadblock, the movement reverts to using non-road rate movement. If it does not have enough MF to enter the hex using non-road-rate cost, it is returned to the previous hex that it had entered from. In effect, roadblocks deny the enemy the use of road-rate as if the road was not there.
If a roadblock exists in a hex containing a bridge, the bridge cannot be used by vehicles or for LOS until the roadblock is cleared.
10.11 Create Minefield
A good-order Engineering Company/Platoon (2.6.4) in LOS spending all of its AP can create a minefield in its hex or an adjacent hex within the friendly perimeter15. Minefields can never be created in or removed from an enemy occiped hex, or from within an engagement battle hex, or a hex that the Company/Platoon could not move into, or if the minefield is unknown (meaning it has not been revealed yet). When created, place a secret minefield marker in the hex. In combat minefields adds a +2 strength modifier to the defender on the CRT.
If an enemy unit enters a hex [EXC: for actions to initiate combat] containing a minefield it must stop, losing any remaining MF for that AP and must immediately take a MC [EXC: engineering units entering a known minefield], and if it fails, it degrades and forfeits any remaining AP. All enemy units leaving a minefield hex pay additional 1AP to exit and must pass a MC [EXC: Engineering Units]. Failing the MC results in the unit degrading and remaining in the minefield, forfeiting any remaining AP. Friendly minefields have no affect on friendly units except they cannot use road-rate. As with all activated units, the unit always degrades normally for performing the action(s) after it's activation completes regardless of any minefield MC results.
Minefield hexes have no affect on units performing reconnaissance (10.4) or probe (10.5), although both reconnaissance and probe actions will discover minefields.
10.12 Clear Minefield/Roadblock
A good-order Company (or Engineering Platoon) can remove a known roadblock from an adjacent (or same) hex within the friendly perimeter by expending 1 AP. A good-order Engineering Company/Platoon can remove a known minefield from an adjacent (or same hex) within the friendly perimeter or an adjacent unoccupied enemy hex not under Artillery Interdiction fire by spending all of its AP.
Special engineering vehicles such as Dozers, Flails and Rollers are Engineering Units capable of clearing known minefields within their own hex. A good-order dozer can eliminate a known roadblock in its own hex within the friendly perimeter by expending 1AP. During daytime, a good-order dozer/flail/roller can remove a known minefield from its own hex within the friendly perimeter by spending 2AP [EXC: when deep snow or blizzard conditions exist; or in a flooded area; and dozers cannot remove minefields if the ground is frozen].
10.13 Construct/Repair Bridge
A good-order Engineering Company or a unit designated as a Bridging Company in LOC and LOS can start construction or repairs of a bridge (if it has the bridging equipment), and can continue the operation while good-order, or fatigued, or disordered. Bridging operations stop if the unit becomes disrupted, or demoralized, or dispersed. Only single-lane vehicular pontoon bridges and footbridges can be constructed16. Only special units that are designated as Bridging Companies can construct two-lane vehicular bridges (11.3). The Game Module rules can allow other types of bridges or bridging operations.
Only good-order Engineering Companies and Bridging Companies are capable of building and repairing bridges by spending all of its AP to perform the action. A footbridge can be constructed in 2 Turns and a single-lane pontoon bridge can be constructed in 4 Turns. Two-lane vehicular bridges can be constructed in 4 Turns. Bridge progress is evaluated at the end of the Turn before units recover from degraded states; therefore, a bridge could be started but had made no progress if by the end of the turn the unit's state did not qualify.
Destroyed bridges can be repaired17 on a d6 ≤ 1. A Bridging Company rolls twice for each bridge repair attempt. A damaged bridge can be repaired on a d6 ≤ 4.
The Game Module may provide a finite number of bridging equipment counters in inventory that Engineering Companies will consume to construct bridges; otherwise the bridging equipment is inherent. Bridging Companies are motorized units for cost of terrain purposes.
Bridges do not need to connect to roads on opposite banks, but if they don't, then units may not utilize road-rate through that hex in order to cross. Traffic can utilize the bridge immediately after construction has finished.
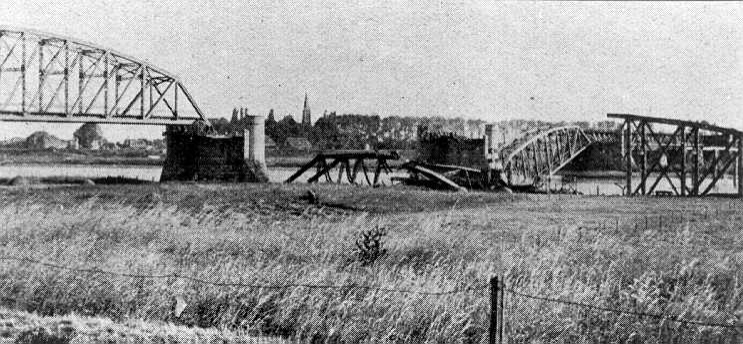
10.14 Destroy/Dismantle Bridge
A good-order Engineering Company/Platoon or Bridging Company can dismantle or destroy a bridge. Success of these actions depends on the type of bridge.
A footbridge, single-lane pontoon bridge or two-lane vehicle bridge can be dismantled in the opposite method of construction18, but in half the time.
Only Good-order Engineering Companies and Bridging Companies are capable of destroying bridges. It requires the unit spending all of its AP to perform the action. Only built bridges during play can be destroyed, all other bridges can only be destroyed by special Game Module rules19. If the Game Module rules allow bridge destruction, wooden bridges are destroyed on a d6 ≤ 5 and a stone/metal bridge is destroyed on a d6 ≤ 4.
10.15 Extended Deployment
An activated HQ spending 1 AP in LOC can order a subordinate Company to go into extended deployment. The subordinate unit now exerts a (total of 6) ZOC hexes, two hexes deep on it's front three hexes of its position20, based on the direction of the extended deployment counter, and exerts no ZOC in any other hex. The unit extending its ZOC does not degrade.
Extended Deployment cannot project ZOC beyond the first enemy owned hex or through an enemy occupied hex. Once an enemy unit enters an extended deployment EZOC it is forced to stop [EXC: armored/mechanized units], the ‘sticky' EZOC will not exist during the following Operational Impulse if the hex entered remains friendly occupied. If a unit in extended deployment moves, it's ZOC returns to normal ZOC.
Example:
The German Commanding Officer activates the 2nd Battalion HQs located off map in hex 13.07, and as one of its three actions orders the 6th Company located in hex 11.05 into Extended Deployment. Just prior to executing the order, the 6th Company exerts a ZOC in all six adjacent hexes: 11.04, 12.04, 12.05, 11.06, 10.05 and 10.04. The Commanding Officer decides that the extended deployment shall be centered on hex 10.04 projecting ZOC out into hex 09.04 and then places the Extended Deployment marker on the unit. Therefore, once in extended deployment the 6th Company exerts ZOC into hexes 10.04 09.04, and 11.04 10.03, and 10.05 09.05; in addition, it no longer exerts ZOC into 12.04, 12.05 or 11.06. The 6th Company does not degrade to perform this order and can still perform actions itself. If it moves/infiltrates or attacks or is attacked (resulting in a battle) it will no longer be in extended deployment. The Commanding Officer never discloses that the unit is in Extended Deployment, but can announce EZOC in any of the six hexes it projects into.
10.16 Assign/Reassign Assets
An activated HQ spending 1 AP can order up to three subordinate assets or Mobile Supply Depots in LOC to be assigned or reassigned to subordinate units. Each asset now freely activates and can spend its available AP to move towards the unit it is being assigned to. Once they enter the same hex, the asset will stack and move with that unit whenever it moves, at the OP/AP cost of that unit. This is a means of reducing the logistical OP cost of managing assets, by assigning them to be subordinate to specific units; hence when the unit moves the asset freely moves with it. The asset also immediately shares the same state as the unit it is assigned to.
If the Game Module has Forward Observer (FO) assets, an activated good-order (Army, Corp, Division, or Brigade/Regiment) HQ can spend 1 AP to assign/reassign an available FO to a Company or Vehicle Platoon that is in LOC.
10.17 Assign/Reassign Units
An activated higher-level (Army, Corps, Division, Brigade) HQ spending 1 AP in LOC can order a Formation, Company, Vehicle Platoon or Battery to be assigned or reassigned to another HQ, even one from another formation21. This is a means of forming battle groups (kampfgruppe/task force). The units now draw LOC from the new HQs, and LOS from the new HQ as well as any of the original parent HQ. The Formation or units being assigned/reassigned do not degrade due to this action.
A unit can report and receive orders from only one formation, which will always be the one that it is currently assigned to, until it is reassigned.
Example:
The 80ID HQ assigns one of its infantry battalions to 4AD CCA, and from that point on that infantry battalion reports and follows orders only from the CCA HQ or the 4AD HQ, until it is reassigned back to 80ID HQ control.
10.18 Deploy/Recombine
If the Game Module supports it, an activated HQ spending 1 AP can order a subordinate good-order Company in LOC to deploy into two ½ companies [EXC: not HQ Companies].
While operating as ½ companies, they each have 2SL and each unit activates independently. Deployed companies can operate as if they were full companies. Neither the HQ nor the Company degrades due to this action.
The two half-Companies can freely recombine back into its original company (the degraded state of the worst of the two ½ companies) whenever they are stacked together in the same hex.
10.19 Rally
An activated HQ spending 1 AP per hex within overland LOC range to rally disrupted, demoralized or dispersed subordinate units stacked within that hex. Neither the HQ nor units degrade due to this action regardless of success/failure.
Each unit (assigned assets use the same result) must pass own MC rally attempt by rolling equal to or less than its ML (Morale Level) with the following DRMs:
- Dispersed +4
- Demoralized +2
- Disrupted 0
If the rally attempt is successful:
- disrupted units become disordered
- demoralized units become disordered
- dispersed units becomes disrupted
A unit can only recuperate its state once each Operational Impulse; therefore it would take a minimum of two separate operational impulses to change a unit from the dispersed state to the disordered state if the rally attempts were successful.
If unsuccessful, no change occurs. A HQ can make additional rally attempts as long as it has AP to spend. Each attempt is paid for and rolled before the next action is spent/performed.
Example:
Since fatigued and disordered units will become good-order during the Unit Recovery Phase, the rally action allows units that are disrupted or demoralized to fully recover to good-order in a single game turn. Whereas a dispersed unit would need two successful rally attempts in separate Operational Impulses to become good-order within a single game turn22.
10.20 Disband
An activated HQ spending 1 AP can order a subordinate unit within LOC to disband and remove its TOCS WWII counter from play23. The HQ does not degrade due to this action.
Each unit on foot step disbanded can decrement a SL marker by one on a surviving unit on foot counter stacked with it, or be added to the Replacement Pool total if the disbanded unit is within LOS.
Each Tracked/Wheeled SP disbanded can decrement a SL marker by one on a surviving Tracked/Wheeled unit's counter stacked with it, or be added to the Motor Pool total if the disbanded unit is in LOS.
Otherwise, if the conditions above cannot be met the unit is disbanded, all guns and vehicles are rendered inoperable and the counter is removed from play.
The disbanded counter is removed from the map and placed in the dead pile and the enemy is awarded the VPs as if the unit were destroyed.
10.21 Reserve
An activated HQ can spend 1AP and order a subordinate unit in LOC that is out of EZOC into reserve at the cost of 1 prepaid OP. The unit entering reserve does not degrade until after it activates as a reserve and all actions have been performed.
HQs can put artillery batteries in reserve so that they can fire during the Reserve Commitment Phase at the same cost for those missions but marking the batteries with a Reserve marker instead of firing. During the Reserve Commitment Phase, batteries in reserve can fire any valid mission type.
Once a unit enters into reserve it remains indefinitely stationary until activated. Activation (as a reserve) can occur only during the Reserve Commitment Phase or the Exploitation Phase and does not cost any additional OPs. If voluntarily activated in any other phase the unit immediately (forfeits the pre-paid OP and) loses its reserve status and must pay the normal 1 OP to activate.
If the reserve unit is EZOCed or Probed (10.5) or attacked on the CRT by ground forces, it immediately loses its reserve status.
10.22 Refit
An activated HQ can order a subordinate unit in LOC and in LOS to refit. The unit successfully refits at the end of the game turn as long as it remains out of EZOC and is neither attacked on the CRT by ground forces or is probed. If successful, the unit can gain 1 step to replace a SL (Step Loss). A unit can never regain more steps than the maximum number of steps the unit has.
The refit action is the means that units on foot can regain steps to replace SLs from the Replacement Pool (12.8) and tracked/wheeled units from the Motor Pool facilities (12.8) if they are in LOS. This allows Game Modules to limit the number of replacement steps available as a means of slowly introducing replacement troops, vehicles and ordinance back into play.
When there are no replacement steps available, units that are refitting can draw from the walking wounded from the Hospital (12.9) and the Field Repair Center (12.10) facilities, but run the risk that it is not guaranteed and will remain in refit mode until successful, or the unit forfeits or if forced out of the refit action.
10.23 Recovery
The recovery mechanics are defined by either the Game Module rules or the TOCS MASL rules.
An activated HQ can spend 1AP and order the recovery of vehicles and guns from within the friendly perimeter. The HQ does not degrade.
Vehicles and guns recovered are added to the inventory of the Motor Pool facility and can be returned when the unit performs a refit action.
10.24 Artillery Strike
An activated HQ can spend 1 AP to order a good-order artillery battery (not Asset) in LOC and LOS to perform an artillery strike (as targeted or harassing fire) against a specified hex within range, and is resolved as a single roll on the Artillery Strike Table. The action does not cost any additional OP points, but the battery consumes all its APs and becomes fatigued. The HQ does not degrade. The non-phasing player can commit artillery batteries that are in reserve (10.21) to fire during the Reserve Commitment Phase.
Harassing artillery fire missions are unspotted and select targets (units, facilities, bridges) by random selection until all damage has been assigned. Even if spotted, a harassing fire mission can be selected.
Targeted artillery fire missions are directed by either a FO or an Aerial Spotter (15.3) that can see the hex, and can specify a single target (units, facilities, bridges) for the attack.
If an artillery strike is ordered as part of a ground combat battle the strength of the full strength of the battery is added to the total combat strength.
10.25 Artillery Bombardment/Barrage
An activated Brigade/Division/Corps/Army HQ can spend 1 AP and order a number (minimum of 3) of good-order artillery batteries (not Assets) in LOC and LOS to perform a bombardment/barrage of a hex within range, and is resolved as a single roll on the Bombardment Table using the combined strength of all batteries firing. Targets are always determined by random selection until all damage has been assigned. All batteries consume all their AP and become disordered. The HQ does not degrade.
If ordered as part of a ground attack battle the bombardment adds 2X the full strength of all firing batteries on the CRT. Batteries in reserve can fire during the Reserve Commitment Phase, and if fired into a battle it is referred to as a defensive barrage.
A Time On Target (TOT) Bombardment was a uniquely American capability that allowed multiple Batteries to coordinate the flight time of their ordinance so that all rounds landed at the same time. This required effort to coordinate this type of mission; therefore, it costs an extra OP to order this mission type, and it is resolved as double strength on the Artillery Bombardment Table. It is only available to the American forces starting in December 1942. All participating American batteries degrade to fatigued when firing a normal Bombardment and degrade to disordered when firing a TOT Bombardment, which illustrates how advanced the American Artillery Network was in WWII.
10.26 Artillery Interdiction
An activated HQ spending 1AP can order a good-order or fatigued artillery battery in LOC and LOS to perform artillery interdiction of a target hex within artillery range. The battery consumes all of its AP and degrades. The target location hex is announced and is marked with an Interdiction marker on the game map and lasts until the start of the next friendly Operational Impulse, even if it is on the next turn.
The non-phasing player can commit artillery batteries that are in reserve (10.21) to fire during the Reserve Commitment Phase.
All units moving into or out of an interdicted hex must immediately pay +1 MP and cannot use bypass movement or roads or road-rate. If forced to retreat into an interdicted hex, units automatically degrade another level.
Example:
The phasing player wants to limit the enemy's ability to move through a road junction, and orders an artillery interdiction mission to fire into the town. During the Reserve Commitment Phase and all units that the non-phasing player moves in or out of that hex will pay the additional +1MP. The mission lasts until the next friendly Operational Impulse; therefore, during the non-phasing player's Operational Impulse any unit (enemy or friendly) that moves in or out of that hex will pay the +1MP cost.
Units that attack out of an interdicted hex are reduced by 1AP, and turn an Intensive Attack into a Deliberate Attack, and turn a Deliberate Attack into a Hasty Attack, and cancels a Hasty Attack.
Example:
The non-phasing player had placed several batteries into reserve so that they can fire during the Reserve Commitment Phase to counter enemy activities. The phasing player announces several hexes that have battles to resolve. During the Reserve Commitment Phase, the non-phasing player activates the batteries held in reserve and can either fire Artillery Strikes, Bombardments or defensive Barrages, but decides to fire Interdiction instead. The non-phasing player chooses to fire the Interdiction mission directly into the battle hex, immediately causing all enemy units attacking into the hex to lose 1AP, and dropping all attacks down one level. Had it been a Hasty Attack, it will have been called off.
The same would have been true if the interdiction had been fired into the hex the enemy units were attacking out of, but firing directly into the battle ensures that all enemy units will be affected.
10.27 Repair/Destroy Facility
An activated good-order Engineering Company can repair or destroy a facility. Very few facilities can be repaired within the timeframe of the game or due to their complexity, while most can be damaged or destroyed by demolition. Refer to the section on Facilities (12.0) and the Game Module specific rules. The engineering company becomes disordered after the attempt.
11.0 Terrain
The TOCS WWII rules support a wide range of terrain types, which can be extended by the Game Modules. As units become activated and either move or perform actions like reconnaissance they will spend their movement point allowance to enter hexes according to the COT (Cost Of Terrain), which is the MP cost needed to enter the hex. Refer to the Cost Of Terrain chart for the terrain costs based on the unit type moving.
Key Concept: Terrain costs (in MPs) are measured from the hex side crossed to the center of the hex. The MPs spent depends on the terrain traversed to reach the center of the hex24.
Key Concept: Hexes may contain many different terrain types in various combinations. Units pay the COT of terrain only for the terrain types that were traveled through from the hex side to the hex center and will pay the highest COT to reach the center plus any streams crossed or contour lines they ascend. If the unit is prohibited from moving through that terrain type, the unit cannot enter the hex from that hex side direction.
Many terrain types are impassible to motorized, mechanized and armored unit unless using roads and bridges, or if they are frozen, or considered dry. The term ‘units on foot' means that they are non-motorized, non-mechanized, non-armored units for movement cost purposes. The term ‘tracked/wheeled units' refers to motorized, mechanized and armored units.
11.1 Highways and Roads
Units on foot, armor and mechanized units moving along a road can claim a one hex road bonus if the entire move action was along the road. All units moving along a road pay the road rate COT and are considering to be moving using column/convoy movement [EXC: Reconnaissance units] if the road is utilized. Any hex that exceeds the stacking limit will restrict the use of its roads, causing any unit entering a congested road network to pay the COT to enter as if the road did not exist. Stacking has no effect on exiting a hex via the road.
A highway is depicted as a paved road and in cities represents a large boulevard. A highway can support two-way vehicular traffic even if the hex is at maximum stacking capacity.
Paved roads (8m+ width) are depicted in grey with black shoulders. Paved roads support two-way vehicular traffic as long as the hex has less than the maximum stacking limit.
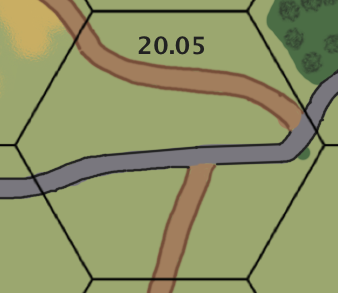
A 6-8m dirt road is depicted by tan with brown shoulders and supports two-way vehicular traffic as long as there are not more than two Vehicle Platoons or Mechanized Company units in that hex.
The smallest roads are akin to country lanes are 3-6m dirt roads, and are depicted by solid brown. All vehicle traffic on 3-6m dirt roads is one-way, where all vehicle traffic is blocked if another tracked/wheeled unit is in that hex.
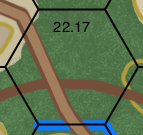
Example:
Hex 22.17 consists of woods and both a 6-8m and 3-6m dirt road. If a tracked/wheeled unit is already in the hex, vehicular traffic entering on the 6m-8m dirt roads will be unaffected. However, vehicular traffic attempt to enter via the 3m-6m dirt roads must do so using the normal COT for entering woods. Units leaving may exit any road normally using the road-rate.
11.2 Railroads
Railroads are depicted by slate gray with brown shoulders and can support rail traffic. Units on foot and Tracked/Wheeled units can travel along railroads as if they were 3-6m dirt roads. Trains (12.3) can only travel on railroads.
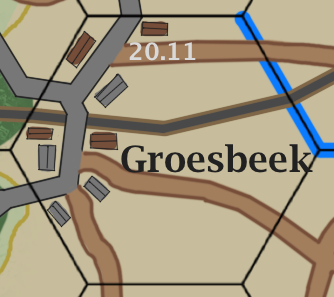
Example:
Hex 20.11 contains a Town named Groesbeek that contains paved roads, 6-8m dirt roads and a railroad that crosses the stream (right) and exiting into the Woods (left).
11.3 Bridges
Unless otherwise depicted or described in the Game Module rules, all paved roads and highways have 2-lane stone or metal bridges capable of carrying all vehicle weights. 6-8m dirt roads have 2-lane wooden bridges capable of bearing 30 tons. All 3-6m dirt roads have single lane wooden bridges capable of carrying 20 tons. All railroad bridges can carry any weight. All streams have culverts capable of carrying any vehicle weight.
Artillery Strikes/Bombardments and/or Aerial Ground Strikes/Bombing that score damage points on a bridge can destroy the bridge. The bridge is not usable until it is repaired. Pontoon footbridges and single-lane pontoon bridges can sustain two hits before they are considered destroyed. Wooden bridges and railroad bridges can sustain 4 damage points before they are destroyed. Stone bridges can sustain 6 damage points before being destroyed. Any metal bridge and any bridge considered to be a highway bridge can sustain 8 damage points before being destroyed.
11.4 Water Obstacles/Flooded Areas
A flooded area is a shallow water obstacle that may or may not have roads depicted. Tracked/Wheeled units are prohibited from entering or exiting except along roads using the road-rate, or if the ground conditions are considered frozen. Roadblocks prohibit tracked/wheeled units from entering by road until the roadblock is removed (10.12). All units on foot pay the COT to enter, or the road rate. Depicted roads are considered to be elevated above the water level in effect making them causeways.
Tracked/Wheeled units attacking into or out of a flooded area are considered to be attacking across a bridge (11.3).
11.5 Swamp/Marsh
A swamp/marsh terrain is similar to a flooded area and is impassible by tracked/wheeled units unless moving along a road, or if the ground conditions are frozen, or if they are considered dry. Units on foot enter swamp/marsh according to the COT unless using a road.
Tracked/Wheeled units attacking into or out of a swamp/marsh hex are considered to be crossing a bridge.
11.6 Ponds/Lakes
Ponds and lakes are large bodies of deep water that are impassible to all units except when bridged, frozen or by watercraft or amphibious vehicles.
Units can move into a hex that has impassible water in the center of the hex and pay the COT of the terrain they entered.
Example:
A unit moving overland could enter hex 08.14 from hexes 07.14, 08.13 and 09.14 and would pay the COT of moving into woods, even though the COT is measure to the center of the hex. Unless frozen or the unit had boats or amphibious vehicles, no unit could enter from hexes 07.15, 08.15 or 09.15.
11.7 Ocean
Oceans are large bodies of water that are impassible to all units except if shallow, or if bridged, or by watercraft, or by amphibious vehicles. The terrain between the ocean and the land is considered the coastline. The COT table dictates the movement cost from the ocean to the coastline, or from the coastline to the ocean. Refer to the Naval Rules section.
Example:
Hex 04.18 is a deep-ocean hex, capable of any size ship. Hex 05.19 is a Normal ocean hex, capable of any boat, landing craft or amphibian. Hex 06.18 transitions from normal-ocean to shallow-ocean as it approaches a rocky shoreline. Only units designated as Commandos can land on rocky shorelines; however, if it were a Beach, any unit could land there.
11.8 Coastline – Beaches/Rocky
Oceans and Lakes abutting landmasses will have either Beaches or Rocky shorelines.
Beaches are a coastline terrain feature that can support vehicle traffic and are suitable invasion/landing sites. Beaches are gradual slope if the water is Shallow, and moderate slope if the water is Normal. Deep water will have either no beach at all or it will be steeply sloped. All forms of landing craft can land on beaches.
Example:
Hex 32.43 has a beach with a gradual slope. The Water approaching the beach is normal and then becomes shallow resulting in the beach slope being gradual.
No landing craft except those carrying Commandos can land on a Rocky coastline. Any unit attempting to do so is eliminated from play.
Example:
A seaborne approach to Hex 04.44 consists of normal-ocean that transition to shallow-ocean and to a rocky coastline. Only Commando units are allowed to land on a rocky coastline.
11.9 Major Rivers
Major rivers are depicted in dark blue and appear wider on the TOCS WWII map artwork and are considered deep. Major rivers are impassible to all units except over bridges, or when frozen, or by watercraft or amphibious vehicles. Ships and boats may operate on major rivers.
Regardless of the river's size or the amount of space shown on the TOCS WWII artwork the defender can decide what side, or both, his forces are defending on. If he claims the river DRM on the CRT it is assumed he is on the far side. Once decided, they cannot switch to the other bank without a means to do so.
11.10 Medium Rivers
Medium rivers are depicted in blue with brown riverbanks and are considered variable depth. Medium rivers are impassible to all units except if bridged, frozen, or by watercraft or amphibious vehicles, or at fords that are depicted on the Game Module map. Boats may operate on medium rivers.
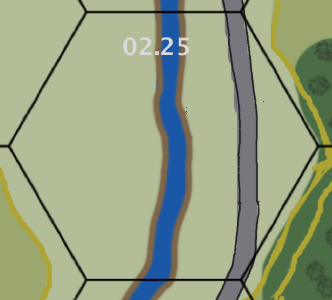
Defenders can claim the river DRM as long as they are all on the opposite side of the river and the attacker has 50% or more of his attack-strength on the far side.
Example:
Hex 02.25 has two sides to the river. Each unit (counter) must be on one side or the other and cannot cross to the far bank without a bridge being built or an Engineering unit provides a temporary ferry crossing, or the scenario dictating that the river is frozen.
11.11 Minor Rivers
Minor rivers are depicted in light blue and appear narrower on the TOCS WWII artwork and are considered variable depth. Minor rivers are impassible to all units except if bridged, frozen, or fordable, or by small watercraft or amphibious vehicles. To cross a minor river the unit must roll on the Fording Rivers table.
11.12 Streams and Gullies
Streams only affect movement cost on the game maps25 when crossing a hex-side. Non-hex side streams that appear within the hex are ignored. A dry stream is considered a Gully.
It cost wheeled units 2MP and all other units 1MP to cross a stream/gully hex-side, unless using a road or railroad. When units cannot use road rate the road can still be used to negate the hexside costs of crossing streams and gullies. Road rate only applies within the hex, not the cost to cross the hexside.
Example:
Units entering hex 37.09 from 37.10 enter using the normal COT. Non-wheeled units entering across any other hex side that are not traveling on the road will pay COT+1 to cross the stream. Wheeled units would pay COT+2 to cross the stream. Units traveling using the road do no pay the cost of crossing the stream.
11.13 Polder and Paddies
Polder and Paddies are represented by a hex with streams on all six hex-sides with irrigation ditches within. Units entering and exiting a Polder/Paddie hex pay +1 to cross the hex side unless traveling along a road.
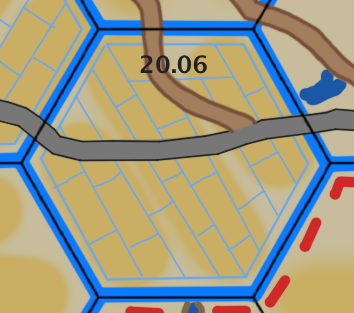
Example:
Units entering hex 20.06 will pay +1 in addition to the COT to enter unless they are using the roads, and will pay +1 to cross the hex-side when exiting the hex unless using a road. This hex has both a paved road and a 6-8m dirt road.
11.14 Fords
Fords are shallow sections of rivers with riverbeds firm enough and free of obstacles for all unit types to cross. Fords can either be depicted by the Game Module as a sandy shaded area across the river, or can be represented as a game marker. Fords that are discovered during play remain secret, unless the opponent performs reconnaissance of a discovered fording site.
A unit must be good order to cross a ford and it consumes all of the units AP.
11.15 Cities
Cities are heavily built-up areas containing many buildings and are depicted by hexes with gray buildings. Combat in the city will use the City/Suburb row on the CRT. Armored units fighting within a city are reduced to ½ strength FRU.
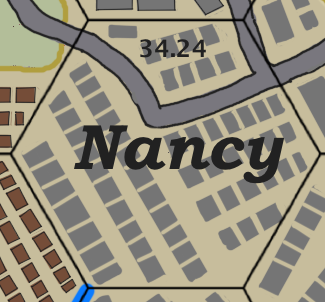
City hexes cannot be bypassed using bypass movement. For line of sight purposes cities are a level-2 obstruction.
11.16 Suburbs
A suburb is a heavily built up area depicted by many small brown buildings, typically adjacent to cities, but can also be stand-alone. Suburbs cannot be bypassed. For line of sight purposes suburbs are a level-2 obstruction. Combat in the suburb will use the City/Suburb row on the CRT. Armored units fighting within a suburb are reduced to ½ strength FRU.
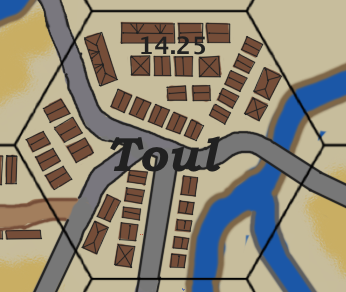
Example:
Hex 14.25 consists of a suburb called Toul and a minor river on the right. The paved road negates the cost of moving across the river into hex 14.26.
11.17 Towns
Towns are built-up areas depicted by both brown and gray buildings. All units can use bypass movement around towns if the width of the counter can fit between the buildings and the hex-side. For line of sight purposes towns are a level-1 obstruction. Combat in the town will use the Town/Village row on the CRT.
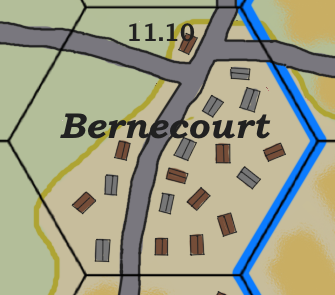
Example: Hex 11.10 consists of a hill on the left and a town called Bernecourt in the center and right. A stream is depicted along the right hand hex sides. The paved road negates the cost of moving across the stream into hex 12.10.
11.18 Villages
Villages are the smallest built-up areas in the TOCS WWII system and are depicted by brown buildings. All units can use bypass movement around villages if the width of the counter can fit between the buildings and the hex-side. Villages for all practical purposes can be thought of as small towns. For line of sight purposes villages are a level-1 obstruction. Combat in the village will use the Town/Village row on the CRT.
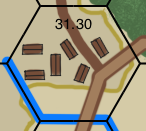
Example:
Hex 31.30 consists of a hill with a village on it. A 6-8m Dirt Road and 3-6m Dirt Road runs through the village. A unit entering from 31.31 not using the road would pay +1 to cross the stream and +1 to ascend the slope and COT to enter the village. Moving using the road would negate the cost to cross the stream but would still pay +1 to ascend the slope, but would use road-rate as the COT. If a tracked/wheeled unit were in the hex, the 3-6m road could not be used.
11.19 Mountains and Hills
Hills are elevated terrain features depicted by contour lines and a change in map hex colors and pose an increased movement cost when ascending. Mountains are huge in size with much steeper and abrupt contour line transitions. The Game Module will define what the contour elevation change is for each line.
Contour lines define the shape and slope of an elevation. Since movement is always from the hex-side to the center of the hex, it is the number of contour lines crossed to get to the hex center that determines the additional cost and slope.
When a unit ascends across a contour line it pays an additional +1 MP for each line crossed in addition to the COT until it reaches the hex center. A unit must have enough movement points to reach the hex center, or it cannot enter that hex from that hex-side. Only Commandos and Mountain units can cross a cliff hex-side.
Tracked/Wheeled units cannot ascend/descend more than two contour elevations unless on a road.
Whenever there is a two contour line height advantage over any (line of sight) obstacle, the wireless communication range is increased by two26.
If the Game Module has Forward Artillery Observer units in the OOB and they are located on hills with sufficient height advantage over line of sight obstacles, they can direct artillery out to the limit of the visibility range. A HQ does not have to issue orders for the artillery units to fire, as they fall under the control of the Forward Artillery Observer27. The FO must be 1 level (or more) higher than the intervening terrain obstacle to see over it. The standard visibility range is 4 hexes during day, but environmental conditions can reduce this.
HQ, Companies, Vehicle Platoons and Reconnaissance units on a hill must have a +1 contour level height advantage over the height of any intervening obstruction that do not perform any action, are entitled to one free observation check of a hex within their line-of-sight to a max range of 4 hexes [EXC: weather, night]. The opponent only says whether the observed hex is empty or occupied28.
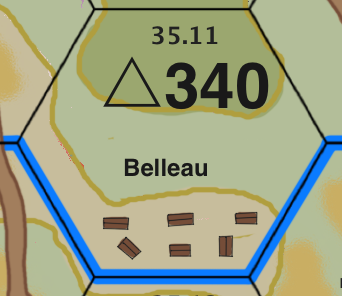
Example:
Hex 35.11, known as Hill 340, consists of the village of Belleau at the bottom and two contour lines to the top. A FO at the top would have a 1 level height advantage over the village of Belleau and would allow hex 35.12 to be observed for artillery fire. In addition, other units in the hex could perform a free observation check of hexes within the 4 hex ranges, if they had a height advantage over any terrain in between.
Units entering hex 35.11 from 35.12 would pay +1 to cross the stream and +1 to ascend the first contour line in addition to the COT. They would not pay for the second contour line because it is past the center of the hex. A unit leaving 35.11 into 35.10 pays only the COT because movement is from the hex-side to the center of hex 35.10; therefore the second contour line in hex 35.11 is free and abstracted into the overall movement mechanics of the game system29.
11.20 Open Ground
Open ground is considered any hex that is devoid of other terrain features. Combat in the open will use the Farmland/Open row on the CRT.
Example:
Hex 15.04 consists of an area devoid of any other terrain type is considered ‘open' regardless of elevation.
11.21 Farmland
Yellow fields on the map artwork depict farmland. Combat in farmland will use the Farmland/Open row on the CRT.
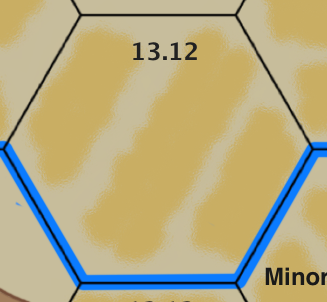
Example:
Hex 13.12 consists of farm fields. Units crossing the stream must pay +1 MP additional to enter. Yellow fields depict farmland.
11.22 Bocage
Bocage is a form of farmland where the fields are divided by multiple hedgerows. A hedgerow is an earthen berm with hedges and bushes growing on top of it used for flood and wind control and property boundaries between farmers. For line of sight purposes bocage is a level-1 obstruction. Combat in the bocage will use the Bocage row on the CRT.
Units on foot can enter bocage hexes, but wheeled vehicles and mechanized units may only enter/exit on roads or railroad tracks. Good-order fully tracked vehicles can move into a bocage hex without a road by expending all of its available AP. Rhino Tanks (Sherman M4) equipped with Cullin Devices or fully tracked vehicles accompanied by a dozer asset pay COT+1 to enter a Bocage hex.
Units performing a Move action in bocage at night (13.1) or in fog (13.4.1), rain (13.4.3), heavy falling snow or blizzard (13.4.4) is subject to straying (10.1.3).
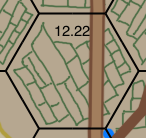
Example:
Hex 12.22 consists of Bocage. All vehicles entering along the dirt road would cost the road-rate. Only good-order fully tracked vehicles can enter without using the road by will expend all of its APs. However, “Cullin Equipped” fully tracked vehicles, or fully tracked vehicles with a dozer asset will pay COT+1 to enter.
11.23 Desert
Desert is depicted by a sandy gravel texture on the map artwork. Combat in the desert will use the Open row on the CRT.
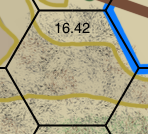
Example:
Hex 16.42 consists of a Desert hill centered in the hex. Entering the hex from 17.42 would cost +1 to cross the stream and +1 to ascend the slope to the hex center plus COT. Entering from 17.43, 15.42 or 15.43 would only cost COT to enter because no elevation contour lines are crossed from the hex side to the center. Entering from 16.41 or 16.43 would cost +1 to cross the elevation contour line plus COT.
11.24 Orchard / Grove
Orchards and groves are depicted by the map artwork as a series of individual cultivated trees. For line of sight purposes orchards/groves are a level-1 obstruction. Combat within an orchard or grove will use the Farmland row on the CRT.
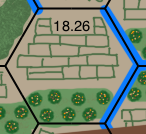
Example:
Hex 18.26 consists of Bocage (top) and an Orchard (bottom). Entering from 18.27 costs COT for Bocage because it is higher than that of the Orchard. Entering from any other hex side costs the COT for Bocage and +1 if the unit crossed the stream.
11.25 Woods
Woods are depicted in green with black outlines of some trees. Woods hexes are densely populated with trees of various heights and represent a level-1 line of sight obstruction. Woods that are completely surrounded by other woods hexes are considered forests; therefore, if adjacent to any other terrain type, they are woods. Woods hexes can be bypassed if the counter width can fit between the woods and the hex side being bypassed. Combat within a woods hex will use the Woods row on the CRT.
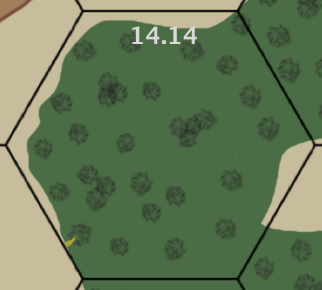
Example:
Hex 14.14 consists of woods. Units entering hex 14.14 from any direction pay the COT for woods. Hex 14.14 can be bypassed along the 13.14 and 14.13 hex sides because it appears that a counter on edge could fit between the woods depiction and the hex side. Players are encouraged to actually test it in order to confirm the move is legal.
11.26 Forest
Any interior solid woods hex (surrounded on all hex-sides by other woods hexes) is considered a forest. A forest hex cannot be bypassed even if it has open ground depicted. Forest is a level-2 line of sight obstruction. Combat within a forest will use the Forest/Jungle row on the CRT. Armored units fighting within a forest are reduced to ½ strength FRU.
For each forest hex that wireless radio communication travels through reduces the wireless communication by 1.
Units moving within a forest are subject to straying (10.1.3).
11.27 Jungle
Jungle is a dense tropical terrain feature that is a level-2 line of sight obstruction. Jungle hexes cannot be bypassed. Combat within a jungle will use the Forest/Jungle row on the CRT. Armored units fighting within a jungle are reduced to ½ strength FRU.
For each jungle hex that wireless radio communication travels through reduces the wireless communication by 2.
Units in a jungle are subject to straying (10.1.3).
12.0 Facilities
Facilities provide logistical support for military operations such as transportation hubs, ports, railyards, hospitals, field repair centers, airbases, supply dumps, and POW camps30. Facilities are fixed location installations that cannot move and are vulnerable to damage from naval gunfire, artillery, air strikes, aerial bombing and intentional demolition by ground units or capture by enemy ground units.
The Game Module will indicate which facilities are in play and how many DP (Damage Points) each one can sustain until it is considered destroyed. While attacks and deliberate demolition (10.27) can destroy a facility, some can be repaired during play, although most facilities are too intricate to repair with what is on hand.
If captured, the benefits of the facility might be of value, such as capturing a supply depot, or repair center, or port. However, capturing a V2 rocket site would provide no benefit except for excellent museum artifacts. It is up to the player capturing the facility as whether to start the demolition process. Either player can capture or recapture a facility an unlimited number of times.
12.1 Ferry Crossings and Boat Launches
Any road terminating at a pond, lake, river or ocean is considered a Boat Launch if there is no mating road depicted on the far bank. Small boats that are towed and amphibious vehicles can move in either direction between land and water paying only the COT. Amphibious units can move to/from water/road without having to pay the additional +1 MP to cross the riverbank inherent crest line.
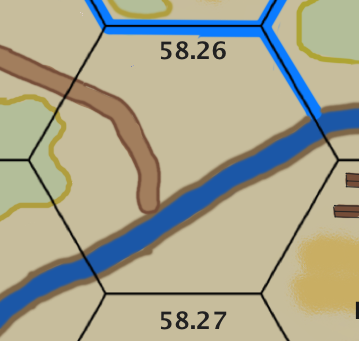
Example:
Hex 58.26 is considered a boat launch because the road terminates at the river. If the road had been on the other side of the river (without a bridge), it would have been considered a ferry crossing.
Any road that terminates from opposite banks of a non-bridged river is considered to be a ferry crossing. Each ferry crossing has a weight limit and portage capacity, indicating the types of vehicles it is capable of transporting. Typically a ferry can transport up to 4 steps of units per Operational Impulse.
In the event that the ferry had been destroyed or is inoperable, an Engineering Company (2.6.4) can improvise a temporary ferry crossing at no AP cost to ferry up to 4 (unit) steps across rivers and canals. There is no associated activation or AP cost, other than the engineering company must start in the hex to establish the temporary ferry and does not degrade to ferry other units across, but if it ferries itself across it will need to activate and degrade. Any number of units can be ferried across as long as the total number of their remaining steps does not exceed 4. The units being ferried must start in the hex with the engineering company, and will spend all of their AP to cross and will degrade. While establishing a temporary ferry, the engineering company can perform other tasks, such as bridge building, smoke generation (if capable), improving positions, clearing minefields, performing refit, or any other action that does not require the engineering counter to leave the hex.
12.2 Railyards and Railheads
Railyards and railheads can act as supply distribution centers, whereas railheads also act as the terminus of a rail line. Units can be transported by rail to/from railyards and railheads, or to/from any city, town or village in a hex containing a railroad. Supplies can be transported, based on the Game Module rail transport capacity to/from a railhead/railyard from/to a supply base/dump/depot in or adjacent to the hex.
Supply points are transferred between source and destination as long as the rail line is not destroyed, or that enemy ground units do not block the rail line by creating a roadblock on the rail line.
The Game Module will define whether trains are in play and the rail capacity, and train schedule and/or availability.
12.3 Trains
Trains are a contiguous series of cars behind an engine(s) that travel exclusively on railroads and are used to transport supplies and units. Trains move up to 20 MP per Operational Impulse but do not require an activation to move.
Trains can only move along railroads31 that are free of Roadblocks or destroyed bridges. If a rail line is damaged, destroyed, or contains a roadblock, the train will stop in that hex.
Trains move along railroads at the COT of 1 for each hex and pay the +1 cost to go to a higher elevation when crossing slope lines. Trains can only move along rail lines and must stop if the hex contains a roadblock until it is removed (10.12).
If the train enters an engagement battle hex it passes directly through it catching the enemy off guard; however, if the hex contains a roadblock the train stops in the engagement hex and becomes part of the engagement battle. On units on foot, light AA guns and mortars can be added to the combat strength of the battle, all motorized/mechanized infantry can add half their strength, and tracked units cannot participate as they have no means of offloading.
Vehicles can be recovered from a train that is not at a rail station or railyard via a Recovery (10.23) action and a successful Refit (10.22) action.
If the train enters an enemy owned empty hex not containing a roadblock or destroyed Railroad Bridge the train passes through the hex, but the hex remains enemy owned.
If the train enters an enemy occupied hex or an engagement battle not containing a roadblock or destroyed Railroad Bridge, it catches the enemy off guard and passes through the hex and no ambush battle occurs.
If the train enters an enemy occupied hex containing a roadblock or a destroyed Railroad Bridge an immediate ambush battle occurs with only units on foot riders participating in the combat strength. Tracked/Wheeled units riding on a train add nothing to the combat strength.
If a train enters an engagement battle hex containing a roadblock or destroyed Railroad Bridge the train stops in the engagement hex and becomes part of the engagement battle, adding only the units on foot to the combat strength.
Tracked/Wheeled vehicles can only unload at either a City, Railyard or Railhead facility (12.2), or perform a Recovery action (10.23) to unload the vehicles. Trains that are blocked by roadblocks or destroyed bridges can reverse direction in order to find another route.
Example:
Hex 20.11 contains a Town named Groesbeek that contains a railroad. If the hex were enemy owned but did not contain a roadblock, all trains would pass through the hex regardless if the hex were occupied or locked in an engagement battle. However if the hex did contain a roadblock the train would be compelled to stop. If the hex was empty the train could stay in the hex or reverse direction. If it was enemy occupied the train would be ambushed. If it were marked with an engagement battle marker it would become part of the engagement battle.
12.4 Airbases/Airfields/Airstrips
On-board air fields/bases/strips allow on-board Ready aircraft to be On-Station the Operational Impulse that they are activated; unlike off-board Ready aircraft that must first move to the In Flight box and won't become On-Station until the next friendly Operational Impulse. On-board aircraft benefit from quicker tactical response time, at the risk of being vulnerable to ground attacks, artillery strikes, artillery bombardments or aerial attacks against the facility. Damage can occur to both the facility (reducing aircraft stacking) or against aircraft on the ground.
Artillery and aerial attacks against airbases, airfields and airstrips are conducted on the Artillery Strike or Bombardment table or Aerial Strike or Bombing table. Damaged on-board aircraft are removed from play.
On-board airbases have hardened tarmacs and can operate all air mission types in all ground conditions. Both airfields and airstrips are known as “fair weather” fields due to the lack of a hardened tarmac. On-board airfields have dirt tarmacs that can fly all air mission types, but cannot operate during soft ground or mud. On-board airstrips are small grass fields that can support only some air mission types and cannot operate in soft ground, mud or ground snow conditions.
12.5 Ports and Harbors
Ports are larger facilities within a city or town or village adjacent to a major river, lake, or ocean. A harbor differs from a port in capacity and the ability to offload cargo more efficiently. Ships and boats can dock and load/unload and rearm/refuel at functional port/harbor facilities. Each port/harbor has a naval stacking capacity printed on it. Damage to the facility can reduce the naval stacking capacity by one for each damage point.
12.6 Naval Bases
Naval bases are ports that can resupply and refuel all forms of naval vessels.
12.7 Supply Bases and Dumps
Supply bases and dumps are fixed position facilities. These facilities will have a number of supply points governed by the Game Module rules that can be transported by mobile supply depots at the logistical operational cost of spending OPs.
Supply base/dump facilities can be destroyed by friendly or enemy units, and can be damaged by artillery or aerial attacks. The number of damage points reduces its supply capacity proportionally.
12.8 Replacement/Motor Pool
The Replacement Pool and Motor Pool facilities are abstracted as off-board facilities that track the amount of steps available for Refit actions (10.22). Each time a unit successfully performs a refit action the pool is decremented by one and the unit regains one step by decrementing the SL (Step Loss) marker on that unit.
Units on foot can replace SLs from the Replacement Pool on a one for one basis; by decrementing the total steps in the Replacement Pool and then reducing the SL counter by one.
If the total steps in the Replacement Pool is zero (0), units on foot can rely on walking wounded from a friendly functional Hospital (12.9) during the refit action.
Likewise tracked/wheeled units can draw from the Motor Pool by decrementing the total steps and the decrementing the SL counter for a successfully refit action. If the Motor Pool total is zero (0) units that perform a refit will rely on the Field Repair Center (12.10).
12.9 Hospitals
Hospitals can be fixed map position facilities or field hospital counters. Captured hospitals can be used by whichever side currently owns the hex. When the Replacement Pool (12.8) for units on foot is zero, units performing refit actions can rely on walking wounded from the Hospitals.
When the Game Module has Hospitals in play and they are friendly owned and functional:
- All friendly units on foot will recover one step by decrementing the SL marker on the unit's counter on a successful d6 of 1-4. On a d6 of 5-6 the unit fails, but the Refit marker remains on the unit.
When the Game Module does not have Hospitals in play or when they are enemy owned or not functional:
- All friendly units on foot will recover one step by decrementing the SL marker on the unit's counter on a successful d6 of 1-3. On a d6 of 4-6 the unit fails, but the Refit marker remains on the unit.
Each damage point applied to a enemy Hospital facility is considered one VP (Victory Point) for the opponent, due to propaganda and political implications.
12.10 Field Repair Center
A field repair facility can be a fixed map position facility or a counter that allows tracked/wheeled units that successfully perform a Refit to regain vehicle and guns.
When the Game Module has Field Repair Centers in play and they are friendly owned and functional:
- All friendly tracked/wheeled units will recover one step by decrementing the SL marker on the unit's counter on a successful d6 of 1-3. On a d6 of 4-6 the unit fails, but the Refit marker remains on the unit.
When the Game Module does not have Field Repair Centers in play or when they are enemy owned or not functional:
- All friendly tracked/wheeled units will recover one step by decrementing the SL marker on the unit's counter on a successful d6 of 1-2. On a d6 of 3-6 the unit fails, but the Refit marker remains on the unit.
12.11 POW Camps
POW Camps are a fixed location facility for detaining prisoners of war. If the Game Module has POW Camps in play, they are worth VPs (Victory Points) if captured and liberated.
If a liberated POW Camp contains prisoners that were captured during play, add half the total number of steps FRU to the Replacement Pool total (12.8)32.
12.12 Forts
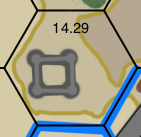
13.0 Environmental Conditions
The Game Module will provide the possible weather conditions that existed throughout the operation, which can be either historic, or variable.
The TOCS WWII system weather rules simulate developing weather patterns and environmental conditions that evolve and progress over a period of Operational Impulses. There are several aspects to environmental conditions in the TOCS WWII system:
- Time of day (Dawn, Day, Dusk and Night)
- Moon Phase (New Moon, Quarter Moon, Full Moon)
- Atmospheric conditions (clear, scattered clouds, overcast)
- Temperature (normal, freezing, extreme winter)
- Precipitation (clear, fog, mist, rain, falling snow, blizzard)
- Ground Conditions (firm, soft, moist, wet, mud, frozen, ground snow, drifts)
- Wind Intensity (no wind, mild, moderate, gusty)
Visibility changes throughout the dawn, day, dusk, and night turns as well as due to atmospheric conditions and due to precipitation.
13.1 Day/Night Conditions
The Turn Track indicates whether each game turn is considered to be day or night, and the dawn/dusk transitional period between day/night. Day turns are indicated by not being shaded and do not have dawn or dusk.
During day turns, all good order units in LOC and LOS have 3 AP when activated.
During night turns, all good order units in LOC and LOS have 2AP when activated.
During night turns, the movement cost of terrain (COT) for all units is doubled 2xCOT; however, road movement is not affected by this cost increase.
Units moving during night, unless on a road, railroad, or following a canal or river have an increased chance of straying (10.1.3) when in hedgerows, woods, forest or jungle.
The only Air Missions allowed at night are Bombing, Carpet Bombing, Pathfinder, Aerial Supply Drop/Landing, Transport, Rebase, and Paratroop/Glider Landing (only if full moon and clear skies and no fog).
Refer to the National Characteristics (18.0) for the nations in play to determine if they suffer a penalty during night turns. If so, the affected units are further reduced by 1AP during night turns.
13.1.1 Dawn/Dusk
Dawn and Dusk delineates when certain air missions are allowed/prohibited. Fog (13.4.1) is more likely to form after dusk and burn off after dawn. The Turn Record Track indicates which turns include dawn and dusk.
On any game turn marked as dawn the first two (2) Operational Impulses for each player are considered dawn with subsequent impulses considered day. Dawn reduces the observation visibility range to two hexes.
On any game turn marked as dusk the first two (2) Operational Impulses for each player are considered day with subsequent impulses considered dusk. Dusk reduces the observation visibility range to two hexes.
13.1.2 Moon Phase
The Game Module will define what the historic moon phase was for each day. Of the eight phases of the moon the ones of significance are the new moon, quarter moon, and full moon periods, as these will affect the observation visibility range and what air missions are allowable. The others have been extrapolated into this smaller set.
Visibility range during a new moon period is 0. During a quarter moon period the range is 1. During a full moon the range is 2.
All units are subject to straying (10.1.3) on a New Moon period in any terrain. A full moon on a clear or scattered cloudy night negates units from straying, except in interior woods/forest, hedgerow or jungle hexes.
The moon phase is indicated on the Turn Record Chart for night turns as a new moon [●], or a quarter moon waxing [☽], or a full moon [○], or quarter moon waning [☾].
13.2 Temperature
The temperature is managed as part of the Game Module rules and is primarily determines whether the Ground Conditions (13.5) are frozen and whether rivers, swamps, marshes and ponds are frozen. Temperature also controls when Extreme Winter conditions exist.
Extreme winter conditions caused by extremely low temperatures affected men, animals and machines alike. Refer to the National Characteristics (18.0) to determine whether the nations in play are penalized during extreme winter conditions. All units not in a village, town, suburb, city or facility must take a MC if they move, and if they fail will degrade an additional level.
13.3 Atmospheric Conditions
The atmospheric conditions are controlled by the Game Module rules and are rolled at the start of every Operational Impulse33. It consists of wind speed/direction and cloud cover. The Game Module table introduces hysteresis to weather that allows weather patterns or systems to continue once they have started, taking longer to clear once inclement weather starts.
Air Missions can be affected by atmospheric conditions. The Atmospheric conditions for each Sea Zone is rolled separately and marked on the board.
13.3.1 Wind Speed and Direction
Aircraft are grounded during heavy winds and gusty conditions.
13.3.2 Clear Sky
Clear skies have no detriment to visibility and all air missions are allowed (when permissible).
13.3.3 Scattered Clouds
Scattered cloud conditions are required for mist, rain squalls and snow squalls. All air missions can be flown in scattered cloud conditions.
13.3.4 Overcast
13.4 Weather Precipitation
This section deals with the weather precipitation based on the temperature (13.2) and cloud cover, which can produce mist, rain, downpours and snow. The Game Module rules will dictate what the historic weather temperatures were, so that the precipitation becomes a function of the cloud cover.
Snow is only possible if temperatures are cold enough and there are scattered clouds (snow squalls) overcast conditions. It is possible to snow and not accumulate as ground snow.
Air missions cannot be ordered/activated during rain, snow, or blizzard conditions. Aircraft that are already in-flight might be forced to abort and land based on the mission type. Those that are already on-station might also be required to abort. Any air mission allowed during inclement weather that arrives at their intended target location might fail in fulfilling their mission.
13.4.1 Fog
Fog is more prevalent at lower altitudes and from dusk until dawn, when eventually the fog will lift or burn off as the sun comes out. All Ready aircraft are grounded during fog, all In-Flight aircraft remain in flight, and all On Station aircraft are recalled to base.
Fog negates the road bonus for all unit types. All units are subject to straying (10.1.3) when in fog. Observation visibility range in fog is zero.
13.4.2 Mist
Mist can only occur when overcast conditions exist and make the Ground Conditions moist.
13.4.3 Rain
Rain can only occur when there are overcast conditions and makes the Ground Conditions wet.
In-Flight air missions that are on-station may be canceled or may be off target due to rain over the target area. There is a chance that rain may affect the air mission once it arrives on station. Roll a d6, where 1-2 the mission proceeds according to plan, 3-4 the mission is inaccurate by a 2d6 (direction and distance) and 5-6 the mission is aborted.
All movement during rain costs COT+1 when moving across a contour line except along a road.
Observation visibility range during rain is reduced by 2.
13.4.4 Falling Snow and Blizzards
Falling snow can only occur when there are overcast conditions. Snow intensity can be light, moderate, heavy and blizzard conditions. A blizzard is defined as near ‘white-out' conditions.
Observation visibility range is reduce by 1 for light falling snow, by 2 for moderate faling snow, and reduced to zero for heavy falling snow or blizzard.
Heavy falling snow costs COT+1 and blizzard costs COT+2, in addition to ground conditions.
All units are subject to straying (10.1.3) when in blizzard conditions.
All Ready aircraft (15.0) are grounded during falling snow conditions or blizzard conditions, all In-Flight and On-Station aircraft will abort and return to base.
13.5 Ground Conditions
The ground conditions are controlled by the Game Module rules and are either historic or randomized. There are several states of ground conditions: very dry, dry, moist, wet, firm, soft, mud, frozen, ground snow and drifts.
13.5.1 Dry, Moist, Wet
Very dry, dry, moist and wet are controlled by the Game Module rules.
13.5.2 Soft Ground
When the ground conditions are soft, all tracked/wheeled vehicular ground movement off of roads or railroads costs COT+1.
On-board aircraft are grounded if located at a fair weather field.
13.5.3 Mud
Once the ground becomes saturated it becomes mud. When the ground conditions are mud, all tracked/wheeled vehicular ground movement off of paved roads or railroads costs COT+2. All units on foot pay COT+1 when not on a paved road or railroad.
All on-board aircraft are grounded if located at a fair weather field.
13.5.4 Frozen
The Game Module rules will dictate whether the ground conditions are frozen and whether water obstacles are frozen. When temperatures are below freezing for a prolonged period the ground becomes frozen. In addition, marsh, swamp, rivers and ponds can freeze and support the weight of units on foot and if thick enough tracked/wheeled units.
Only Engineering Companies/Platoons can perform the Improve Positions action when the ground is frozen.
13.5.5 Ground Snow
Accumulated ground snow can be light, normal or deep. Light ground snow cover has no effect on play except that it will lead to normal ground snow.
All non-tracked units moving through normal ground snow pay COT+1 unless moving along a plowed road.
All wheeled units are prohibited from moving in deep ground snow unless on a road and will pay COT+2 if the road is not plowed.
All units on foot and tracked units moving through deep ground snow pay COT+2 unless moving along plowed roads.
Example:
If the ground conditions were deep snow, a tracked vehicle would expend COT+2 unless on a paved road, wheeled vehicles are road-bound and would pay COT+2 unless the road is paved, and units on foot would pay COT+2 unless on a paved road.
If it were also blizzard conditions an additional +2 would be added to the movement cost of all units regardless of whether they were on a road, and any movement that isn't following a road, railroad, stream, river, canal or coastline would be subject to straying.
Had the unit been equipped with skis, it would move at COT and gain a MP for each crest line descended; however, skiing in blizzard conditions would still add +2 to the COT.
In normal and deep ground snow, all units on foot equipped with skis can increase their movement capabilities by paying only the COT, and adding a bonus of one MP for each contour line descended. The skis are inherent capabilities of the unit and cannot be transferred.
14.0 Air Rules
The air rules cover the basic mechanics of the air mission sequence from orders to takeoff, performing the mission, and then landing and refueling/rearming from off-board airbase facilities and from on-board airbases, airfields and airstrips.
The TOCS WWII Game System abstracts aircraft into air missions and air capabilities and not into specific aircraft types. The Commanding Officer was concerned with the air mission and less about what type of aircraft had performed it. To be true to the Commanding Officer the TOCS system has abstracted aircraft details into air mission types that can be ordered (requested) by Army, Corps or Division HQs air liaison staff.
14.1 Aircraft States
Aircraft are always in one of the following states on the Aircraft Ready Chart:
- Landed
- Rearming/Refueling
- Ready
- In-Flight
- On-Station
Each Operational Impulse aircraft will advance to the next state, Landed → Rearming/Refueling → Ready. When an OP is spent for an air mission, off-board aircraft will move to In-Flight and will arrive On-Station during the next friendly Operational Impulse. On-board aircraft immediately move to On-Station.
If the current turn ends with aircraft In-Flight they will arrive On-Station during the first friendly Operational Impulse of the next game turn. If the target hex was an engagement battle the In-Flight aircraft will become part of the engagement battle.
Aircraft On-Station will perform the air mission during the current friendly Operational Impulse. Aircraft that have completed their air mission must return to any off-board or qualified on-board facility into the landed box.
14.2 Flight Plans
Some air missions are so intricate that they require designing a flight plan, which serves the purpose of not being able to deviate from it by information learned en route. The flight plan defines the path (in hexes) that the aircraft will follow to the target hex and allows AA units to fire as the flight moves from hex to hex towards the intended target. The effects of AA fire and environmental conditions can cause aircraft to abort the mission, be destroyed, or to go off target and be inaccurate.
For each air mission requiring a flight plan, the phasing player must record the aircraft flight paths from the board edge to the intended target hexes. Once the mission at the target hex is completed remove the aircraft and return it to the landed box.
Examples of air mission types requiring flight plans are: Paratroop Drop/Glider Landing, Air Transport, Bombing, Carpet Bombing, and Air Supply Drop/Landing. All other air missions do not require that level of logistical planning.
14.3 Aircraft Losses and Aborted Missions
When aircraft are lost through combat damage, remove the aircraft counter for the rest of the Game Turn. When an aircraft retreats from combat, or voluntarily aborts the mission, the mission is canceled and the aircraft will return to base and the aircraft has landed.
14.4 Weather Conditions
Weather can adversely affect air missions. Each air mission will list the weather conditions required for launch or how it might affect success. In general, fair-weather grass airfields and airstrips cannot be used when the ground is soft (13.5.2) or mud (13.5.3) or there is ground snow (13.5.5). Whereas airbases have paved runways and are plowed.
All Ready aircraft are prohibited from launching air missions during high winds, fog (13.4.1), rain (13.4.3), falling snow or blizzard conditions (13.4.4). Air missions that are in-flight will continue. Air missions that are on-station will abort the mission and return to base and land. Air missions can be aborted due to bad weather, at any time.
14.5 AA-Fire against Aircraft
All good-order AA (Anti-Aircraft) Batteries and AA assets can defensive fire at en route enemy aircraft performing air missions34. The combat is resolved on the AA-Combat Table. AA units that maintain their ROF (Rate of Fire) can fire again as the aircraft enter another hex. AA units that fail their ROF will degrade to the next lower state. The combat can result in aircraft being eliminated, aircraft aborting the mission, or cause aircraft on flight plans to veer off course. AA units are defined as Light-AA and Heavy-AA gun types, designed to be effective against different altitude (low, medium, high) enemy air missions.
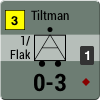
Light AA units with guns less than or equal to 50mm, can only fire at low-altitude aircraft missions. Light AA units have a ROF located in the yellow box and it has a range of one hex. Light AA units can fire on the following low altitude air mission types: Aerial Reconnaissance, Aerial Obeservation/Spotter, Air Transport, Aerial Propaganda Drop, Combat Air Patrol, Escort, Aerial Interdiction, Tactical ground Support, Aerial Ground Strike, Pathfinder, Paratroop Drop/Glider Landing, and Aerial Supply Drop/Landing.
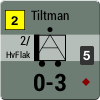
Heavy AA units are depicted by the solid bar on the left side of the unit symbol, and have guns greater than 50mm, and can fire only at medium/high altitude aircraft missions. Heavy AA units have a ROF located in the yellow box and has a range of two hexes. Heavy AA units can fire on the following medium/high altitude air missions (e.g. above 1500m): Bombing, and Carpet Bombing.
14.6 Air-to-air Combat
Whenever friendly and enemy aircraft occupy the same hex, air-to-air combat will occur if either performed Escort, Combat Air Patrol, Ground Strike, or Interdiction. The air combat is fought in rounds using the Air Combat Table until either one side is destroyed, or is driven off, or voluntarily aborts the mission. The surviving aircraft then performs the air mission.
14.7 Attacking on-board facilities
All on-board airbase, airfield and airstrip facilities (12.4) are vulnerable and can be attacked by any combination of ground units, air missions or artillery strikes/bombardments. Facilities have no inherent defenses and must be provided by the AA units (14.5) and aircraft on Combat Air Patrol (15.7).
If attacked by enemy aircraft, resolve any air-to-air combat first (14.6) against defending CAP (Combat Air Patrol) missions, and then against the facility's AA defense. Then resolve the attack against the facility and any landed, rearming/refueling and ready aircraft applying damage in the same order. The non-phasing player can now launch ready aircraft for either a Rebase air mission, or a Combat Air Patrol mission. Continue with air-to-air combat until one side or the other breaks off or is destroyed. Aircraft that break-off can return and land at any facility except the one they are at.
If attacked by artillery/bombardment, resolve the attack evenly against all landed, rearming/refueling, and ready aircraft. After the attack, all ready aircraft can immediately perform a Rebase air mission.
15.0 Air Missions
TOCS WWII game system provides a rich set of air missions that augment the Commanding Officer's ground action capabilities. In general, each air mission must be ordered and requires spending OPs to activate. Once activated the air mission is planned and recorded as to its specific objective.
Any number of available Ready aircraft can participate in the air mission, or provide a supporting role such as Escort, Pathfinder or Aerial Spotter to another mission type.
Example:
The American Commanding Officer orders an Aerial Supply Drop of two aircraft each with a capacity to drop one SP, and provides one aircraft to act as an Escort and one aircraft as a Pathfinder.
The flight of four aircraft encounters a hit by light-AA fire along the flight plan en route to the drop zone that causes a one hex drift.
In addition, a single German aircraft CAP intercepts the flight, causing the Escort to conduct Air-to-air combat, resulting in the German aircraft aborting and returning to its airbase.
The flight continues to the DZ, where the Pathfinder negates one drift, meaning that it arrived accurately at the DZ, but each SP is now subject to drift on the Descending Drift Table.
When the SP lands it become a Mobile Supply Depot owned by whoever owned the hex. All aircraft return to base and are placed in the landed box.
Once planned and recorded, air missions cannot be altered or canceled while In-Flight or On-Station and will arrive on target as recorded, even if it results in attacking friendly units35
15.1 Create Airstrip
An activated good-order Company spending all of its AP can work to create an airstrip in open ground. The airstrip is completed after 5 OPs have been spent constructing it. Good order Engineering Companies and those that are fatigued can also contribute towards the construction effort.
Once completed the only missions capable of operating from an airstrip are: Aerial Reconnaissance, Aerial Observer/Spotter, and Rebase from an airstrip.
15.2 Aerial Reconnaissance
A good-order Divisional HQ (or higher) in LOC spends 1AP can order an Aerial Reconnaissance mission and pays 1 OP to activate it.
Reconnaissance aircraft perform recon on either a 7 hex radius centered on the target hex, or a 7 hex straight line following the grain or alternating grain on the map board. The non-phasing player must announce whether each hex is empty or occupied, and the type of unit(s) discovered as infantry (Companies/HQ), vehicles (vehicle platoons/assets) or guns (batteries/assets) [EXC: motorized or mechanized infantry are reported as both infantry and vehicles]. Aerial reconnaissance performed on interior woods/forest/jungle hexes results in no information gained.
If aerial reconnaissance is performed on a hex that is attacked resulting in a battle, the CRT reconnaissance column shift applies.
15.3 Aerial Observation/Spotter
A good-order Divisional HQ (or higher) in LOC spends 1AP to order an aerial observation plane or spotter aircraft to be flown.
If it is flown as an aerial spotter, it improves accuracy (DRM) on any Aerial Ground Strike mission or Artillery Strike action or Bombardment action. The defender must specify the targets (facilities and units types present) and the attacker may select a specific target, or utilize random selection.
If flown as an aerial observer into a battle, the aircraft will appear as an observation plane resulting in a favorable column shift on the CRT.
An aerial observer mission can be flown to a target hex within the enemy perimeter and remain on-station throughout the enemy's next Operational Impulse and can observe all enemy movement in that hex and all adjacent hexes, as well as any artillery unit that fires. If any unit moves into or within the 7-hex zone, it must be announced as if aerial reconnaissance (15.2) had been performed. Any unit moving at non-road-rate at 2xCOT is unobserved and does not have to announce their movement. Movement within forest/jungle is unobservable unless moving by road or railroad.
15.4 Air Transport
The phasing player can spend 1 OP to perform an air transport mission between two friendly airbases/airfields. The unit(s) being transported must start its turn located at the facility that has Ready aircraft. The unit does not degrade upon reaching the transported destination; however, he unit cannot be activated during the Operational Impulse that it was transported.
Only units on foot are air transportable. Vehicles cannot be air transported unless in gliders (15.15).
15.5 Rebase
The phasing player may freely rebase Ready aircraft at no OP cost to any friendly airbase/airfield. Upon arriving at the destination facility they are moved into the landed box. Aircraft can never rebase to an airstrip (12.4).
15.6 Aerial Propaganda Drop
The phasing player can spend 1 OP and perform an aerial propaganda drop on a target hex. The leaflets dropped will cause a MC for units out of LOC within the target hex, or a 1MC if the target hex is out of LOS within a pocket. Units that fail the MC will degrade to the next lower state and units that fail the 1MC will degrade two levels.
15.7 CAP – Combat Air Patrol
The phasing player can spend 1 OP for a combat air patrol mission of a 19-hex zone emanating (2 hexes out) from the target hex. The phasing player must announce that CAP is being exerted from the target hex.
Any aircraft in or entering the zone can be intercepted on the Air Interception Table, and will result in air-to-air combat resolved on the Air Combat Table.
The CAP mission remains on-station until the end of the opponent's Operational Impulse.
15.8 Escort
The phasing player can freely assign aircraft at no additional OP cost to any other air mission type. The escort aircraft are there solely for air-to-air fighter protection of the primary air mission. Once that mission completes the escort aircraft can return to any friendly airbase/airfield and are placed in the landed box.
15.9 Aerial Interdiction
The phasing player can spend 1 OP for an aerial interdiction mission to be flown to a designated target hex where it will remain On-Station until the end of the opponents next Operational Impulse. The aircraft will interdict enemy ground units moving within the 19-hex zone emanating (2 hexes out) from the target hex. Once the aircraft is on-station it must be announced that it is performing aerial interdiction.
Any enemy ground unit that moves into or within the interdiction zone is subject to an aerial interdiction attempt on the Aerial Interception Table. If interdiction is successful, at least one aircraft (if stacked) is immediately converted to an Aerial Ground Strike (15.11) against the moving unit. After the attack that aircraft will return to base into the landed box.
If the enemy units [EXC: trains, boats/ships] spend 2xCOT for each hex entered and do not use road rate, the moving unit(s) are unobserved and do not announce that they are moving within the interdiction zone. However, all other movement must be announced for each hex entered, and the type of unit (train, boat/ship, vehicle, infantry, guns). Units moving within forest or jungle are unobserved unless moving along a road or railroad.
15.10 Tactical Ground Support
A good-order Brigade HQ (or higher) in LOC spends 1 AP to order a tactical ground support mission to be coordinated with a battle and activates it at cost of 1 OP. Tactical Ground Support provides a 1-column shift advantage, and a 2-column shift advantage when using napalm.
American and British have a special tactical ground support advantage that is available in July 1944 or later that allows ground support aircraft to stack with and accompany moving units, by assigning the aircraft to a unit as if it were an asset. When the unit moves, the ground support aircraft move with it. If a battle or ambush results, the aircraft provides a favorable column shift on the CRT36. This air mission ends at the end of the opponent's Operational Impulse.
15.11 Aerial Ground Strike
The phasing player can spend 1 OP per aerial ground strike mission. The target can be enemy ground units, railroads, bridges, facilities or supply dumps/bases/depots37. Resolve the attack on the Aerial Ground Strike Table, and then return the aircraft to the landed box at any airbase/airfield.
If there is more than one target type, the attacker may choose the target type (units on foot, tracked/wheeled units, bridges, facilities). If there is more than one target counter of that type, apply the damage by random selection among those counters.
15.12 Pathfinder
There is no OP cost to assign Pathfinder aircraft to other missions to identify and mark targets with smoke or illumination flares for the following air mission types: Bombing, Carpet Bombing, Paratroop Drop/Glider Landing, Aerial Supply Drop.
Each Pathfinder aircraft improves the accuracy of the mission they accompany at the target hex by negating drift by one, or by providing a DRM for accuracy on the Aerial Ground Strike Table or Bombing Table.
15.13 Bombing
There is no OP cost for bombing missions because this is handled at a higher level. The Game Module rules will define when bombing missions occur. The phasing player is required to record a flight plan (14.2) to the target hexes.
Unless part of the Pre-Game Special Sequence, bombing missions always start from off-board bases and move to the In-Flight before arriving On-Station. Resolve the combat on the Bombing Table.
Because of the altitude Light AA guns cannot attack bombing missions, only Heavy AA guns en route to the target hex (14.5).
Pathfinders (15.12) will improve the mission accuracy by adding a DRM on the Bombing Table. Damage is always assigned by Random Selection.
15.14 Carpet Bombing
Carpet bombing missions are the same as bombing missions and require a Flight Plan (14.2). Game Module rules will specify a number of hexes that can be hit in a rectangular pattern. A flight plan must be registered. Due to the magnitude and saturation of a carpet-bombing attack, resolve each attack twice on the Bombing Table. Damage is always assigned by Random Selection.
Carpet bombing missions were often inaccurate and resulted in accidental ‘short bombings' that hit friendly troops. Roll a d6 to determine the accuracy adding +1 for each Pathfinder (15.12) accompanying the mission. The mission is accurate if the d6 of 4-6. If inaccurate, roll a 2d6 where the colored die is the direction of inaccuracy and the white die is the distance (1-5 is one hex off, 6 is two hexes off).
15.15 Paratroop Drop/Glider Landing
Paratroop Drops and Glider Landing missions do not cost any OPs as they are organized at a higher level and originate from off-board airbases, or will be part of the Pre-Game Special Sequence.
The phasing player must record a flight plan to specify how each flight will reach its specific target drop zone. Each HQs unit must be assigned an individual drop zone target hex. Each HQs and the units under its command are considered a flight and require the path to the drop zone to be identified in the flight plan. Each flight will move hex-by-hex until it reaches their intended drop zone.
Unless part of the Pre-Game Special Sequence, paratroop drop/glider landing missions always start from off-board bases and move to the In-Flight before arriving On-Station.
All vehicle counters and towed guns must land in gliders.
Paratroopers/gliders can only be attacked by low altitude only Light AA Fire (14.5) that haven't lost ROF can attack on the AA Combat Table or enemy aircraft performing Combat Air Patrol missions. Players should track the number of AA ‘hits' each formation flight has accumulated en route to its intended drop zone, as this will affect the extent of drift. Once the aircraft is at the DZ, perform the drift procedure once for each ‘hit' to determine the landing hex.
Regardless of AA fire ‘hits', en route paratroopers and gliders are always subject to descending drift on the Descending Drift Table over the final DZ hex.
AA-fire adjacent to or over the landing hex does not cause drift; instead each ‘hit' causes units in the flight formation to degrade to the next lower state selected by Random Selection.
Landing in a hex containing any forest, jungle, or city causes the unit to land disrupted. Landing on a river or canal causes the unit to land dispersed. Glider Landings in a Bocage (11.22) or Polder/Paddies (11.13) hexes cause the unit to land degraded one level. Landing in an all water (pond, lake, ocean) hex causes the unit to be eliminated.
Paratroops/gliders landing on enemy occupied hexes are subject to ambush (10.1.2). Landing within an engagement battle will join the battle as fatigued.
Paratroopers cannot call in any Artillery Missions including defensive OBA/NOBA until the beginning of their 2nd Impulse. Paratroopers do not exert ZOC until the beginning of their 2nd Impulse38.
Example:
A Paratrooper Battalion HQ and all of its subordinate units are following their flight plan en route to the landing zone and are fired on by light-AA guns from one hex away. The AA gun can continue to fire as the flight moves to the next hex as long as the AA gun has not exceeded its ROF. Each hit results in drift to the flight causing it to deviate from the landing zone by one hex, with a random direction. Upon arrival at the LZ each drift ‘hit' is rolled sequentially to determine the final hex the unit will land in. Roll the random direction and move the stack one hex, then repeat until all hits have been resolved.
If light-AA fires at the unit in or adjacent to that final hex and scores hits, each hit will degrade unit(s) randomly selected, to the next lower level before landing.
Descending paratroopers and gliders are subject to a final drift on the Descending Drift Table.
If the hex is a forest, jungle or city hex the unit lands one level further degraded. If the hex was a river or canal the units land in the worst possible state, dispersed. If the hex was an all water hex, the units are eliminated.
If the unit(s) land on top of an enemy occupied hex, they will be ambushed. If the battle results in both opponents remaining within the hex, the hex is marked as an engagement battle.
15.16 Aerial Supply Drop/Landing
The phasing player can spend 1 OP to order an aerial supply drop or an air supply landing mission, which will originate from an off-board airfield. The phasing player must file a flight plan. The mission will deliver one SP (Supply Point) per aircraft in the mission to the target hex.
Air Supply Drop is subject to drift due to light AA fire en route to the target drop zone. Each SP dropped is subject to drift on the Descending Drift Table. Any SP falling within the enemy perimeter becomes enemy owned. Once on the ground place a Mobile Supply Depot counter where each SP landed.
Air Supply Landing requires a friendly functional airbase, airfield or airstrip and becomes a Mobile Supply Depot once landed.
16.0 Naval Rules
The TOCS WWII game system abstracts large areas of navigable water into Sea Zones, where each sea zone contains a series of numbered boxes [0][1][2][3] that represent the available actions that naval units can perform when in that sea zone. These sea zone boxes serve to abstract distance, location, time and ability that units have within a large geographical area. These boxes are also used to determine whether an interception has occurred. It is possible for both sides to have naval and air units in the same sea zone and not detect each other for possible interception. Whenever any naval or air unit enters a sea zone it is announced to the opponent, then both sides at their discretion can attempt an interception. Opponents always keep their forces within a sea zone hidden and secret, unless an interception results in a combat.
At the owner's discretion, units within a sea zone can be rearranged during any friendly Operational Impulse into lower sea zone box numbers in order to keep fleets combined within the same box number. This abstracts the entire fleet consuming the same time during operations.
16.1 Ship Movement in Sea Zones
Some sea zones can contain all-water or partial-water hexes adjacent to land, for purposes of landing or transporting ground units between landmasses and sea zone boxes. The sea zone extends to the coastline or to the line that divides an adjacent sea zone. Amphibious ground units can traverse water hexes, but cannot enter a sea zone box [EXC: Embarkation].
It does not cost any OPs to activate naval units (because they are controlled by another military branch and not the Commanding Officers), but they can only activate once per Operational Impulse. For each action they perform (AP Spent) they will be move into a lower sea zone box. Naval units in the [0] sea zone box have no AP to spend and cannot be activated to perform actions.
Naval units can perform a Move action only once each Game Turn and can either move individually or as a combined fleet from the current sea zone to the destination sea zone, except for any units in the [0] as they are incapable of performing actions.
Naval units/fleets can either:
- Spend an AP and move from a port facility into the [2] box of an adjacent sea zone, or
- Spend an AP and move from a non-[0] box to a port facility that is adjacent to the sea zone, or
- Spend an AP and move from a non-[0] box to an adjacent sea zone as long as it rolls (d6) equal to or less than the number of the sea zone box it is currently in.
Once a naval unit moves, the counter is flipped to the moved side and cannot move any further during that Game Turn. If the move from one sea zone to another sea zone is successful, the units are moved into the next lower box of that sea zone. A combined fleet makes one die roll (d6) based on the lowest sea zone box of the moving units.
Activated naval units can perform as many actions as they AP to spend, until they end up in the [0] box. The actions can include firing at targets on shore, or unloading troops, or moving.
At the end of the phasing player's Operational Impulse naval units that have not performed any actions or have been involved in any interception or combat, may advance one sea zone box to the right.
At the end of each Game Turn all naval units are flipped back to their normal side and are moved to the next higher box in the sea zone. All air units are returned to base and/or ships.
16.2 Aircraft Movement in Sea Zones
All aircraft originate from either off-board bases, or from on-board bases, or from ships capable of launching aircraft. The term ‘base' is used loosely to mean any airbase, airfield, or airstrip or seaplane base, or ships.
Aircraft are limited to two sea-zone move actions; after the second move the aircraft flips to the moved side. The move into the first sea zone is analogous to the In-Flight characteristic of aircraft, except they can intercept or be intercepted within that zone. Aircraft do not have to roll to determine if they can move the second sea zone, it is automatic [EXC: aircraft in the [0] sea zone box]
Aircraft cannot be launched from ships that are in port facilities (12.5). Aircraft launched from ships within a non-zero sea zone box are placed into the [3] box. The ship spends an action to launch aircraft; however, it does not when recovering landing aircraft. Aircraft entering a sea zone from a land airbase are placed into the [2] box of the sea zone.
Each ship capable of launching aircraft is treated as an airbase for tracking its landed, rearming/refueling and ready aircraft.
Example:
An aircraft carrier in the [3] box spends 1 AP to launch an aircraft to patrol within another sea zone, the aircraft carrier is moved into the [2] box, and the aircraft is placed in the [3] box and it now has 3 AP to spend. The first AP is spent moving into the current sea zone [2] box (hence In-Flight) and if enemy aircraft does not intercept it, can spend a second AP to move to an adjacent sea zone, where it would end in the [1] box, where enemy aircraft in that zone could intercept it.
Aircraft can move only one location per Operational Impulse:
- From a ship to the current sea zone, or
- From an off board based to an adjacent sea zone, or
- From one sea zone to an adjacent sea zone, or
- From an on-board base to an adjacent sea zone, or
- From a sea zone to a ship or on-board base or land target.
Example:
An aircraft at an on-board airbase wants to rebase to an aircraft carrier in the [2] box of adjacent sea zone. The aircraft spends 1 AP to fly from the base into the sea zone [2] box and spends 1 AP to land on the carrier. Since it has a third unused AP, it could have searched to see if it located any enemy units before landing on the carrier.
16.3 Intercepting Enemy Ships and Planes
Each time the phasing player's units move into or out of a sea zone containing enemy naval or air units that are not in the [0] box, the opposing player can attempt an interception.
Each time that aircraft within a sea zone performs a Search (17.2) or ships perform a Patrol (17.3) that detects the presence of enemy aircraft or ships within that sea zone the non-phasing player must announce whether aircraft or ships or both have been located. The phasing player may decide whether to attempt an interception.
Players at their discretion determine if they want to attempt an interception and if either or both do, then they each roll one d6 on the Naval Air and Surface Interception Table and apply the appropriate DRMs. Since sea zones are blind to both opponents, neither will know what forces they may encounter during the interception until the battle is resolved.
A successful interception will result in a combat.
Example:
In the previous enemy ?Operational Impulse the enemy had announced that units had moved into a friendly occupied sea zone; however, interception attempts failed to locate the other player's forces. Unless another unit enters the sea zone to trigger another interception attempt, both sides coexist without knowledge of each other's disposition. The PP (Phasing Player) launches a ready aircraft from a carrier in the sea zone and moves the carrier from box [3] into box [2] and decides to move the carrier escorts with it into box [2] to protect it. The aircraft now spends 1AP to search the sea zone and find nothing and moves into the [2] box. It spends another 1AP to search again and finds that enemy ships are in the sea zone, and the aircraft now moves to the [1] box. This triggers an interception opportunity that the PP will take. The PP launches all remaining ready aircraft on the carrier and places them in the [3] box and moves the carrier and its escorts into the [1] box.
The PP roles a d6 3 and the NPP (Non-Phasing Player) rolls a d6 5, resulting in the NPP being surprised, but only by the units in box [3]. The PP has to decide whether the aircraft in the [3] box will attack enemy boxes [0], [1], [2] or [3], or any combination of them. If the selected boxes have enemy units the combat will be resolved.
16.4 Attacks against Land-Based Targets
Ships and aircraft not in a [0] box can attack land-based facilities (12.0) and enemy land units adjacent to that sea zone. The attack is a Shore Bombardment mission and counts as an action for all participating ships and they are moved to the next lower sea zone box following the attack.
Ship attacks against land targets are performed a Shore Bombardment mission, and is resolved on the Bombardment Table.
Aircraft that have only moved one sea zone can perform air missions over land as their second move. Afterward the aircraft are returned to the landed box after the mission completes.
Example:
An aircraft carrier in the [3] box launches an aircraft to perform a reconnaissance mission beyond the established beachhead and then is moved to the [2] box. The aircraft moves into the In-Flight box and in the next Operational Impulse will move into the On-Station box ready to perform the reconnaissance flight. After the reconnaissance mission completes, the aircraft is returned to the carrier's landed box.
16.5 Combat within Sea Zones
Combat within sea zones only occurs when a successful interception occurs and the player wishes to perform the attack.
The maximum number of battles that can result from a successful interception is two, where both sides succeeded to intercept and each player chose a different sea zone boxes to attack. In this case the highest box number is resolved first.
Battles are always resolved in the following order:
- Air-to-Air Combat
- Air-to-Surface Combat
- Surface-to-Surface Combat
- Anti-submarine Warfare
- Sub-to-Surface Attacks
Disabled ships are immediately moved to the 0-box within the sea zone. Damaged ships are marked with the number of hits. Damage is cumulative and ships exceeding their number of damage points are sunk. Ships that sink are removed from play.
Naval aircraft that are destroyed are removed from play. Land-based aircraft that are destroyed are removed for the remainder of the Game Turn.
Aircraft that have no ship to return to, can land on another ship that has available capacity, or can land at any friendly airbases adjacent to the sea zone. Otherwise they will ditch and be destroyed.
16.5.1 Air-to-Air Combat
Combat within the sea zone is blind, where both players allocate aircraft to screen and attack. Aircraft allocated to attack must attack all screening enemy planes first, and excess aircraft can attack Surface (non submarine) ships.
Attacks against enemy aircraft are performed on the air-to-air CRT.
16.5.2 Air-to-Surface Combat
Aircraft that were not part of the air-to-air combat can now attack ships. This is resolved on the Air-to-Surface CRT.
Combat within the sea zone is blind, where each player allocates ships that can screen for others. There is no limit to the number of groups that can be created.
Players then assign a specific target priority to accomplish, the default order is: Carriers, Transports, Battleships, Cruisers and then Destroyers.
Screening ships are used to help protect more valuable ships by randomizing hits (damage points) to the group. When damage occurs on the Air-to-Surface CRT, randomly determine which ship within the group takes the damage for each hit.
16.5.3 Ship-to-Ship Combat
After all aircraft attacks are resolved, ships can attack ships. At this point the battle is not blind and ships can be seen.
If one player has more ships than the other, some ships can screen for other ships. Each screening ship must first be attacked, before extra ships can attack those being protected.
Ships that are being protected cannot fire back unless they are attacked.
Combat is resolved for each ship attacked on the Surface-to-Surface CRT.
16.5.4 Submarine and ASW Combat
Each aircraft that was assigned to a naval patrol mission that rolls less than or equal to the sea zone box it is in may locate and attack an enemy submarine in that box. This is resolved on the Air-to-SUB CRT and the results are immediate.
At the end of the game turn any ships allocated to a naval patrol mission rolls (less than or equal to its sea zone box) to locate and attack enemy submarines. This is resolved on the ASW (Anti-Submarine Warfare) CRT and the results are immediate39.
Hits on subs result in either them being disabled and moved to the [0] box or they are sunk.
Any remaining subs that roll less than or equal to their sea zone box can attack opposing ships. The combat is resolved on the SUB-to-Surface CRT to determine if it causes damage, sinks, or disables a targeted ship in that sea zone box. After subs attack, they are moved to the next lower sea zone box.
17.0 Naval Missions
Ships and aircraft can perform naval missions within sea zones by spending actions and moving to the next lower sea zone box for each action spent.
17.1 Move Mission
Ships and Subs can move only once per game turn, and only to/from an adjacent sea zone or from to and adjacent port facility (12.5). Ships can move to a lower sea zone box, within the same sea zone, at no cost.
17.2 Search Mission
Aircraft can be assigned to search a sea zone box for enemy units. The enemy player must reveal they type of units located (Aircraft, Surface, Subs). This immediately triggers an interception attempt (d6), where all units in sea zone boxes less than or equal to the d6 may attack. After the search mission the aircraft will land.
17.3 Patrol Mission
Each cruiser, destroyer, flotilla, patrol boat that performs a patrol mission can detect and attack submarines within its sea zone, if it rolls less than or equal to its sea zone box. It can also detect enemy Surface ships and aircraft in its sea zone box, immediately triggering a successful interception. The only knowledge the non-phasing player provides is the type of units found (Surface, Subs, Aircraft). The phasing player can decide to attack or not. After performing the mission, move the ships to the next lower box.
17.4 Minesweeping/Minelaying Missions
Surface ships and some Subs are capable of laying minefields within shallow areas within sea zones as indicated by partial or full water hexes. Typically these occur between adjacent sea zones or constricted areas between sea zones and landmasses. For each ship performing this mission can add or remove one minefield factor from that water hex. Enemy ships and submarines that move through a mined are subject to attack during the transition into/out of the sea zone. Resolve the combat on the Minefield CRT.
17.5 Shore Bombardment
Ships performing this mission can attack facilities or enemy units that are within naval gun range (in hexes) to the sea zone. Resolve the combat on the Bombardment Table.
17.6 Fire Support
Ships performing this mission are available for providing NOBA support (akin to Artillery Strike or Bombardment except provided by naval guns on ships) for combat occurring on land. This support can be called in to support either offensive or defensive battles. The ship counter specifies the range of the ships guns, 14-16”, 8-13”, and 5-7” guns have different ranges. Some ships are equipped with multiple gun sizes and can provide multiple fire missions.
17.7 Dock/Undock
It cost one action for ships or submarines to move to a port facility and one action to dock. Ships/Subs do not pay to undock, instead they move into the 2-box of the sea zone. Ships in port must be docked.
17.8 Load/Unload Cargo
Units and/or supplies are considered cargo and can only be unloaded while docked at a port. Each transporting ship may either unload/load during this mission at a port or harbor facility (12.5) or naval base (12.6) for the cost of one action. The transport capacity is the total number of steps (TOCS WWII counter steps) it can carry. The Transfer Rate is the maximum number of steps that can be loaded or unloaded for each action spent. These values can either be on the ship counter artwork or on the sheet that is used to mark the Damage Points. Typically this sheet provides boxes for the game markers to be placed. When a ship sinks all units being transported by it are lost.
17.9 Transport Embark/Disembark
This mission allows units to move from/to ships to/from landing craft, covering both landings and evacuations. The ships Transfer RateM is the maximum number of steps that can be transferred for each action spent. Vehicles must be either amphibious or use an appropriate landing craft capable of transporting it. The total available landing craft are provided as part of the Game Module.
17.10 Transfer/Rescue
Whenever ships receive damage, the infantry units on it can be transferred at sea to other ships that have available capacity. All vehicles and ordnance guns [EXC: mortars] belonging to those transferred/rescued units are lost.
18.0 National Characteristics
Each nation demonstrated different characteristics throughout the war. This section consolidates and summarizes these differences into a common set of rules that apply to Game Module game mechanics. The NC#NC# is the National Characteristic DRM for that nation. The SR# is the Supply Range in hexes from a vaild supply source for that nation.
18.1 Axis Forces
The following countries fought for the Axis Powers.
18.1.1 Germany
The German army, navy and air force have the following TOCS WWII special characteristics.
- Prior to 10/41:
- All Axis vehicle platoons suffer from mechanical breakdown in Africa (10.1.4)
- Prior to 01/42:
- German Paratroopers are ½ strength FRU during the 1st impulse they land (15.15)
- 04/42 onward:
- Germans are no longer subject to Extreme Winter penalties (13.2)
- Prior to 01/43:
- German units on foot are considered lax at night (13.1) and are further reduced by 1AP during night
- 01/43 onward:
- Aerial Spotters and Aerial Observation missions are allowed
- 10/43 onward:
- German companies and infantry AT platoons have 1 AT factor based on ATMMs, Panzerfausts and Panzerschrecks becoming available (2.2)
- 01/45 onward:
- German companies and infantry AT platoons have 2 AT factors due to increased Panzerfaust range and availability (2.2)
18.1.2 Italy
The Italian army, navy and air force have the following TOCS WWII special characteristics.
- Entire War:
- Non-Elite Italian TOCS WWII Companies cannot enter Extended Deployment (10.15)
- Non-Elite Italian Companies cannot Deploy/Recombine (10.18)
- Roll twice for each non-elite Italian prisoner being interrogated (19.7)
- Prior to 10/41:
- All Axis vehicle platoons suffer from mechanical breakdown in Africa (10.1.4)
- 04/42 onward:
- Italian forces are no longer subject to Extreme Winter penalties (13.2)
18.1.3 Finland
The Finnish army, navy and air force have the following TOCS WWII special characteristics.
- Entire War:
- SISSI are elite troops and are ski-trained and equipped (13.5.5)
- Finnish units are not subject to Extreme Winter penalties (13.2)
- Finnish companies can freely enter Extended Deployment without orders (10.15)
- Finnish units can freely Assign/Reassign Assets without orders (10.16)
- Finnish companies can freely Deploy/Recombine without orders (10.18)
- Finnish units can Rally without the presence of a HQ, but have a +1 added to the MC (10.19)
- Finnish units can freely Disband and be reconstituted by being brought back into play as reinforcement in the nearest city/town/village, as long as there is an EZOC free path. It takes 1 full day to enter as reinforcement (10.20)
- 01/44 onward:
- Finnish artillery have Plentiful Ammunition [EXC: against Germans], which is abstracted within the TOCS game system.
- 10/44 onward:
- Finnish companies and infantry AT platoons have 1 AT factor based on ATMMs, Panzerfausts and Panzerschrecks becoming available2.2
- 01/45 onward:
- Finnish companies and infantry AT platoons have 2 AT factors due to increased Panzerfaust range and availability (2.2)
18.1.4 Hungary
The Hungarian army and air force have the following TOCS WWII special characteristics.
- Prior to 01/44:
- Hungarian units do not qualify for Combined Arms CRT bonus until Jan 1944 (19.2)
- 04/42 onward:
- Hungarian forces are no longer subject to Extreme Winter penalties (13.2)
- 10/44 onward:
- Hungarian companies and infantry AT platoons have 1 AT factor based on ATMMs, Panzerfausts and Panzerschrecks becoming available (2.2)
- 01/45 onward:
- Hungarian companies and infantry AT platoons have 2 AT factors due to increased Panzerfaust range and availability (2.2)
18.1.5 Romania
The Romanian army, navy and air force have the following TOCS WWII special characteristics.
- Prior to 07/43:
- Romanian units do not qualify for Combined Arms CRT bonus until Jul 1943 (19.2)
- 04/42 onward:
- Romanian forces are no longer subject to Extreme Winter penalties (13.2)
- 10/44 onward:
- Romanian companies and infantry AT platoons have 1 AT factor based on ATMMs, Panzerfausts and Panzerschrecks becoming available (2.2)
- 01/45 onward:
- Romanian companies and infantry AT platoons have 2 AT factors due to increased Panzerfaust range and availability (2.2)
18.1.6 Bulgaria
The Bulgarian army, navy and air force have the following TOCS WWII special characteristics.
18.1.7 Vichy France
The Vichy French army and navy have the following TOCS WWII special characteristics.
- Upon Creation of Vichy France:
- Vichy French units do not qualify for Combined Arms CRT bonus (19.2)
18.1.8 Japan
The Japanese army, navy and air force have the following TOCS WWII special characteristics.
- 01/38 onward:
- No quarter is in effect against Chinese and no prisoners can be taken (19.7)
- Japanese Companies can declare a Banzai Charge and gain a +1 CRT column shift, but all retreats must be taken as step losses from the units performing the charge.
- 04/42 onward:
- Japanese are no longer subject to Extreme Winter penalties (13.2)
- 06/42 onward:
- No Quarter is in effect against all opponents and no prisoners can be taken (19.7)
- 01/44 onward:
- Japanese companies have a +1 AT factor due to Tank-Hunter Heroes and ATMMs (19.4)
- 01/45 onward:
- Japanese Air-to-Surface naval attacks can subtract -2 from the CRT result, by announcing a Kamikaze Attack before rolling the result and removing the aircraft from play for the rest of the Module Turn (16.5.2)
- Japanese companies have a +2 AT factor due to Tank-Hunter Heroes and ATMMs
18.2 Allied Forces
The following countries fought for the Allied Powers.
18.2.1 United States of America
The US army, navy and air force have the following TOCS WWII special characteristics.
- 01/42 onward:
- An activated HQs spending 1AP can activate up to three (3) Batteries to perform any combination of Artillery Strikes (10.24) or Artillery Interdiction (10.26) fire missions. This illustrates the superiority of the American Artillery network and its flexibility and responsiveness by greatly reducing its cost.
- 12/42 onward:
- Time On Target (TOT) Bombardments (10.25) are allowed
- 01/43 onward:
- Aerial Spotters and Aerial Observation missions are allowed
- 01/44 onward:
- There is a -1 DRM when interrogating Japanese prisoners (19.7)
- Can perform Pathfinder air missions (15.12)
- Americans add +1 on Refit die rolls for replacements (10.22)
- 12/42 onward:
- Infantry Battalions ‘on foot' that are in Reserve (10.21) can be considered motorized (truck) units and move as if they are wheeled at the owners discretion
- Can perform Carpet Bombing air missions (15.14)
- American aerial dominance adds +1 DRM all attempts on the Aerial Interception Table
- American Engineering Companies and Bridging Companies can construct or dismantle footbridges, single-lane pontoon bridges and two-lane vehicle bridges in half the time (10.13, 10.14)
- 07/44 onward:
- Napalm available against Japanese (15.10, 15.11, 19.2)
- Can provide Tactical Ground Support air missions for moving units (15.10)
- 08/44 onward:
- Napalm available against Germans (15.10, 15.11, 19.2)
- American aircraft have an additional +1 column shift to right on the Aerial Ground Strike (15.11) table when performed against enemy vehicles, facilities and fortifications to account for rocket-fired napalm.
18.2.2 France
Before the fall/capitulation of France, the French army, navy and air force have the following TOCS WWII special characteristics.
18.2.3 Great Britain, including Commonwealth & Free French Forces
The British army, navy and air force along with their Commonwealth allies and Free French forces have the following TOCS WWII special characteristics.
- Entire War:
- Gurkha troops are Commandos unless green and will not surrender; therefore are not eligible for Prisoner Interrogation (19.7)
- ANZAC troops are Stealthy unless green
- Prior to 07/44:
- Commonwealth units do not qualify for Combined Arms CRT bonus until July 1944 (19.2)
- 01/43 onward:
- Aerial Spotters and Aerial Observation missions are allowed
- 01/44 onward:
- There is a -1 DRM when interrogating Japanese prisoners (19.7)
- Can perform Pathfinder air missions (15.12)
- 06/44 onward:
- Can perform Carpet Bombing air missions (15.14)
- 07/44 onward:
- Can provide Tactical Ground Support air missions for moving units (15.10)
- 01/45 onward:
- Napalm available against Japanese (15.10, 19.2)
- 04/45 onward:
- Napalm available against Germans (15.10, 19.2)
18.2.4 Soviet Union
The Soviet army, navy and air force have the following TOCS WWII special characteristics.
- Entire War:
- Good-order and fatigued Russian companies can dig “Entrenched” Improved Positions but must spend all their available AP to do so (10.9)
- Soviet Companies cannot enter Extended Deployment (10.15)
- Assign/Reassign Units action is prohibited (10.17)
- Soviet Companies cannot perform Deploy/Recombine actions (10.18)
- Soviets do not qualify for Battalion Integrity CRT column shift unless two or more attacking Companies declare Human Wave and all retreat results must be taken as step losses (19.2) from the units performing the human wave attack
- Prior to 01/44:
- Soviets do not qualify for Combined Arms CRT bonus until 1944 (19.2)
- 04/41 onward:
- Soviet units are no longer subject to Extreme Winter penalties (13.2)
18.2.5 China, G.M.T. Forces
The Chinese G.M.T. army, navy and air force have the following TOCS WWII special characteristics.
- Entire War:
- Chinese GMD troops do not qualify for Combined Arms CRT bonus (19.2)
- Prior to 01/45:
- Assign/Reassign Units action is prohibited before Jan 1945 (10.17)
- Chinese GMT Companies cannot perform Deploy/Recombine actions before Jan 1945 (10.18)
- 01/38 onward:
- No quarter is in effect against Red Chinese resulting in no prisoners taken or Prisoner Interrogation (19.7)
- 01/44 onward:
- There is a -1 DRM when interrogating Japanese prisoners (19.7)
- Aerial Spotters and Aerial Observation missions are allowed
- 07/44 onward:
- Napalm available against Japanese in Burma (15.10, 19.2)
- 04/45 onward:
- Napalm available against Japanese in China (15.10, 19.2)
18.2.6 China, Red Army
The Chinese Red army, navy and air force have the following TOCS WWII special characteristics.
- Entire War:
- Chinese Red troops do not qualify for Combined Arms CRT bonus (19.2)
- Chinese Red Companies cannot enter Extended Deployment (10.15)
- Assign/Reassign Units action is prohibited (10.17)
- Chinese Red Companies cannot perform Deploy/Recombine actions (10.18)
- 01/38 onward:
- No quarter is in effect against Chinese GMT resulting in no prisoners taken or Prisoner Interrogation (19.7)
- 01/44 onward:
- There is a -1 DRM when interrogating Japanese prisoners (19.7)
18.2.7 Holland, Belgium, Norway
The Western European Allied Minor nations (Holland, Belgium and Norway) army, navy and air force have the following TOCS WWII special characteristics.
- Entire War:
- Western European Allied forces do not qualify for Combined Arms CRT bonus (19.2)
- After conquest of their home country, are represented by British or by Partisans
18.2.8 Poland, Greece, Yugoslavia
The Eastern European Allied Minor nations (Poland, Greece and Yugoslavia) army, navy and air force have the following TOCS WWII special characteristics.
- Entire War:
- Eastern European Allied forces do not qualify for Combined Arms CRT bonus (19.2)
- After conquest of their home country, are represented by British or Russian or by Partisans
19.0 CRT Combat Resolution
The CRT (Combat Resolution Table) is the method of resolving battles by determining the strength of the opposing forces to determine the combat odds, and then applying column shifts for each advantage a side has. The results are dependent on a 2d6 roll and the type of attack that was in progress; where longer and better ‘planned' attacks result in more casualties and shorter duration combats do not. Combat occurs within the enemy occupied hex40.
Combat occurs when any of the following conditions exits:
- Resolution of an Engagement Battle at the start of each game turn before players start taking Operational Impulses
- Infiltration into an enemy occupied hex
- Intensive Attack into an enemy occupied hex
- Deliberate Attack into an enemy occupied hex
- Hasty Attack into an enemy occupied hex
- Moving unit and its assigned assets are immediately ambushed after entering an enemy occupied hex
Whenever the above conditions exist the highest-level attack (Infiltration, Intensive, Deliberate, Hasty and lowestAmbush) will take precedence when deciding which column shifts and combat losses and retreats to apply.
Key Concept: Attacks are time-sequenced based on all units having either 3AP (day) and 2AP (night); therefore, the unit(s) that spent the highest AP cost dictates the level of attack, all other units that spent less AP attacking are arriving as reinforcements to the battle. Units that spent AP to perform reconnaissance or probe can also join the attack as long as they spent AP afterwards to join the battle.
19.1 Determining Combat Strength
Both attacker and defender must calculate their combat strength in order to determine the combat odds. The attacker must have at least 1 strength factor to be able to attack, unless ambushed. No side's strength can be reduced below 1.
This total Attacker/Defender strength determines the basic odds with FRD. This is cross-referenced on the appropriate CRT terrain row, based on the terrain of the defending hex.
Some hexes have mixed terrain; use the terrain that is most beneficial to the defender.
19.2 Combat Column-Shift Bonuses
A number of Combat Shift Modifiers can change the Basic Odds in favor of the attacker or the defender. Text in RED are not available during an Engagement Battle even when they were part of the original battle.
19.3 Attacker Column-Shift Bonuses
The following combat column shifts only apply to the attacker.
19.4 Defender Column-Shift Bonuses
The following combat column shifts only apply to the defender.
19.5 Combat Losses and Retreats
The CRT table results are listed as (#R#/#R#) and means (Attacker/Defender) results where #R# is the number (#) of SLs and the number (R#) of hexes retreated. A “-“ means no effect.
The defender always suffers losses and retreats first, followed by the attacker. The attackers losses must first be taken from the units (with the most number of remaining steps with the highest printed strength value) that had performed the longest attacks (Infiltration, Intensive, Deliberate, then Hasty attack). Otherwise, the first SL must be taken from the unit with the most number of remaining steps with the highest printed strength value. Any additional losses can be allocated to any other counters.
Any counter reduced to having no remaining steps is destroyed and removed from the map and put into the dead pile.
During retreats (and any subsequent pursuits or exploitation) all ZOC/EZOC are temporarily suspended. Each hex retreated must always be further away from the battle hex unless forced into a known minefield. Units cannot retreat through enemy units, if entering an enemy occupied hex; they are destroyed and removed to the dead pile.
The attacker or defender can trade-off hexes retreated for SL taken. Likewise SL beyond the first SL can be traded-off for hexes retreated (refer to the CRT)44. However, if any counter retreats the entire force must retreat. Attackers will always degrade for activating, and defenders will always degrade as part of the battle regardless of results; however, Engagement Battles are different because it is a continuation of a previous battle and no activation has yet occurred. Any units retreating from an Engagement Battle will degrade, otherwise units remain in their current state.
- The first SL must be taken by the unit with the most steps remaining and highest combat strength
- Then SLs can be tradeoff for retreats, or retreats can be traded off for SLs
- All units that retreat will degrade, all units that remain in the hex will not degrade
- Pursuit and Exploitation are prohibited
- 3AP-length attack during daytime, 2AP-length attack during night
- Any units that performed Reconnaissance or Probe can join an Infiltration Attack battle if they have remaining AP(s)
- Roll on the Infiltration Table to determine which side receives the (successful/failed) column shift
- The first SL must be taken by the unit with the most steps remaining and highest printed combat strength
- Then retreats and SLs can be tradeoff
- Pursuit limited to 1 adjacent hex
- Exploitation limited to 1 additional hex
- Prohibited at night, because units only have 2AP to spend
- Any units that performed Reconnaissance or Probe can join an Intensive Attack battle if they have remaining AP(s)
- The first SL must be taken by the unit with the most steps remaining and highest combat strength
- Then retreats and SLs can be tradeoff
- Pursuit limited to 1 adjacent hex
- Exploitation limited to 1 additional hex
- Must be the last 2AP spent performing attack
- The first SL must be taken by the unit with the most steps remaining and highest combat strength
- Defender's first retreat (R1) is optional
- Then retreats and SLs can be tradeoff
- Pursuit limited to 1 adjacent hex
- Exploitation is prohibited
- Must be the last AP spent performing attack
- Reduce the number of SLs taken by 1
- Then the next SL must be taken by the unit with the most steps remaining and highest combat strength
- Defender's first two retreats (R2) are optional
- Then retreats and SLs can be tradeoff
- Pursuit and Exploitation are prohibited
- Reconnaissance units suffer 1 less SL and can freely retreat
- All other units suffer normal CRT results and cannot tradeoff SL for retreats or retreats for SLs
- Pursuit and Exploitation are prohibited
19.6 Pursuit and Exploitation
When the CRT results in a defender retreating #R#/#R# or when the defender tradeoff losses for hexes retreated, if the attack allows, the attacker may Pursue and possibly Exploit. The defender can never pursue a retreating attacker. The attacker may never exploit further than the defender has retreated.
The defender always resolves losses and retreats first then the attacker performs his second. All ZOC/EZOC is ignored until all retreats, pursuits and exploitation for the current battle are resolved.
If neither the attacker nor defender retreat or are eliminated, then all counters end up in the hex and are marked with an Engagement Battle marker.
If the attacker retreats they will return back to the adjacent hex that they had attacked from, and if that is not possible will then retreat into a friendly owned hex. The attacker's units will degrade [EXC: reconnaissance units].
If the defender retreats, the defender can choose the path they retreat as long as each hex is further away from the battle hex than the previous hex. If the defender retreats all retreating units will degrade.
Units that performed a Hasty Attack cannot pursue/exploit. Units that performed a Deliberate Attack can pursue and cannot exploit. Units that performed an Intensive Attack can pursue and exploit.
Attacking units may not pursue or exploit out of or through an Artillery Interdiction hex 10.26. A pursuing attacker may advance into the adjacent hex the enemy had retreated into/through. After pursuing into that adjacent hex, attacking units capable of exploiting can enter adjacent hexes that are not enemy occupied. If an exploiting unit attempts to enter an enemy occupied hex, it immediately stops in its current hex45.
An attacker that pursues into an enemy occupied hex is immediately placed under an Engagement Battle marker.
19.7 Prisoner Interrogation
Prisoner Interrogation and Civilian Interrogation were intelligence-gathering activities that could provide useful information about the enemy's disposition. The TOCS WWII system provides an abstracted method of gleaning additional information based on each combat.
Each combat SL the enemy suffers, allows for a roll on the Prisoner Interrogation Table. The opponent must answer truthfully.
Each combat that results in the defender retreating from a City, Suburb, Town or Village allows for a roll on the Civilian Interrogation Table. The opponent must answer truthfully.
Footnotes
The game design concept was to model real-life capabilities as closely as possible through a simple set of overall rules. Extended Deployment ZOC is a TOCS WWII game abstraction representing an advance picket line, active patrolling, increased sniper or artillery interdiction that blocks an enemy advance before reaching the main line, forcing an enemy to force their way into contact by expending more time. The TOCS WWII system highlights the importance that reconnaissance units performed in intelligence gathering, scouting and combat. These advantages bestowed upon reconnaissance units attempts to model their capabilities. Due to the fast movement rate of reconnaissance units the column/convoy requirement is waved, allowing recon units more freedom of set up and movement within scenarios. While they can still be ambushed, they aren’t restricted to entering in column/convoy and the defender can only set up HIP units that would qualify for HIP if they had been attacked, which negates most of the defenders ambush advantages. Finally, reconnaissance units can disengage from combat without degrading to a lower state. This allows reconnaissance units to move into enemy hexes, see what develops and retreat out if need be. If a reconnaissance unit performs a recon/probe action it will double the amount of intelligence gathered about the enemy’s disposition after setup. This illustrates the distinct capabilities that reconnaissance units had over similar units of other types. Engineering units are another type of unit that the TOCS WWII system bestows special characteristics, besides being equipped as assault engineers with flamethrowers, demo charges and enhanced smoke making abilities. TOCS WWII allows them to work on rudimentary field fortification like sowing or clearing minefields. Repairing or destroying facilities, such as damaging a port facility before retreating from it, or helping make a damaged airbase functional. Another capability is constructing bridges, assuming they had the bridging equipment. This allows bridges to be thrown across rivers in order to cross or to extract units from the far side. The Engineering unit can then dismantle the bridge, keeping the enemy from utilizing it. Unlike most War Games, TOCS WWII has a full range of degraded states that a unit can be in. As a unit’s state worsens, it can perform fewer actions and performs worse in scenario combat. Commanding Officers must be aware of units that are degrading and adjust their battle plans to avoid this. The concept behind announcing ZOC and EZOC at anytime or not to at all, is to raise the fog-of-war uncertainty and to make the game turn operational impulse interactive. The result is a fluid situation that eliminates a rigid system where interdicting enemy movement can only occur at specific times. This is analogous to reaction fire or opportunity fire. The concept behind ZOC/EZOC not going away is to eliminate the free reconnaissance that would be obtained by the enemy announcing that he is moving and his EZOC no longer exists. If players want to establish whether they are still ‘in contact’ with the enemy, perform reconnaissance to determine if he is still there; otherwise, just assume he is. Enemy ZOC represents an area outside the main defensive position that is covered by patrols, long-range direct fire and artillery support. Armored and mechanized units have the ability (through their speed and armored protection) to move through a contested area at an increased cost, while non-armored/mechanized units must stop upon entering an EZOC location. This allows armored/mechanized units to penetrate weakly held lines in order to make a breakthrough. Wireless radio LOC allows units within isolated pockets to remain in communications to higher level HQs. The same holds true for ship-to-land communications to coordinate with beachheads, airheads and bridgeheads across rivers where no overland route is possible. Each nation has a different wireless LOC distance based on the radio sets that had been available to them, and are defined as part of their National Capabilities. The TOCS WWII Commanding Officers need to plan their communications network to ensure that all units can perform at maximum efficiency and can receive orders to perform actions. This is one of the basic tenants of the TOCS WWII system and provides part of the fog-of-war. Only actions that affect the enemy or the enemy’s perimeter are announced, whereas all activities that occur within the friendly perimeter remain secret, unless the enemy has air missions that would observe or be able to interdict movement within the friendly perimeter. This rule is in place to prohibit guns and trucks from being used to modify the perimeter simply by running rampant through them. Therefore within the enemy’s perimeter, non-Recon assets only own the hex they occupy. It is assumed that any inherent vehicles the company has, will join the combat after (secrecy is lost and) the attack has commenced. This rule allows units performing reconnaissance to discover the presence of minefields and roadblocks in empty hexes that had been created by the Create Minefield or Create Roadblock actions, without having to actually move into them. This rule is in place in order to maintain the proper time continuum of a scenario (or combat). Therefore units that perform either Reconnaissance or Probe actions, that are also part of the battle, can’t show up after the attack starts; instead the attack occurs after the action and the actual scenario/combat length is derived from the APs that that unit had remaining. This means that any battle involving a recon/probe cannot be longer than a Deliberate Attack. Units performing recon/probe that are not part of the battle have no effect on the scenario/combat duration, only the units that are participating the actual attack. Often units would sow hasty minefields or create a hasty roadblock in order to slow down a pursuing enemy during a delaying action, blocking action or a fighting withdrawal. TOCS WWII games typically span a short period of time, allowing units to throw the most expedient types of bridges across rivers. Any other bridge types are handled by TOCS WWII Module rules. This rule shows that bridges are much easier to destroy than it is to repair, but if a unit works long enough it can accomplish a hastily repair. Because the d6 of 1 is so low, the length time abstracts the level of destruction and the availability of materials to repair it. A Bridging Unit has a better chance by rolling twice abstracting that it has more inherent means of affecting repairs. This allows for mobile bridging units to throw bridges across rivers, allow the formation to cross, then pull the bridge up and reuse it for the next crossing. This rule is in place to make sure that critical bridges are not deliberately destroyed in order to win ‘the game’. Any bridge can be destroyed or damaged during a scenario unless the TOCS WWII Module rules forbid it. Extended Deployment allows units to block enemy units from making an EZOC-to-EZOC move, thus slowing them down from reaching the main line of defense (the hex were the counter is). Extended deployment is a delaying action with everything deployed far forward, and a vulnerable rear. Two Companies stacked, one in Extended Deployment and the other not, would block enemy movement one hex out in the first EZOC. The other company would provide an all around defense, eliminating the vulnerability in the rearward direction. In the next Operational Impulse the enemy could move adjacent, but this tactic cost the enemy an Operational Impulse to do so, and would be at an even further degraded state and possibly vulnerable to a counterattack. Most games don’t allow players to modify the command and control hierarchy during play, but TOCS WWII allows this just like it would happen in real life. Commanding Officers are free to form battle groups from a mixture of units from other formations by having their superior HQ order it. This way the battle group’s HQ can coordinate the LOC/LOS and units can be assigned as needed for a specific mission. Rallying units is another example of the importance of HQ and illustrates its logistical cost. The HQ must spend an OP to activate and then an AP to rally units within its command radius. If the unit were not within the command radius, the HQ would have to move to it, fatiguing the HQ units. For the rest of the game turn the fatigued HQ would have only 2 AP (during day turns) for command and control (orders). Therefore Commanding Officers should ‘plan’ battles, so that units can recover efficiently and effectively at minimal logistical cost. One tactic is to have the battalion HQs very close to the front where units can retreat towards it. This action provides Commanding Officers a means of reducing logistical cost (OPs) of managing units that are severely depleted, by amalgamating them into other units. Other tactical reasons for doing so would include, disbanding several units into fewer full strength units to reduce the stacking costs in order to move additional units in. Such would be the case of a shrinking pocket of units that are depleted, by amalgamating the weaker units into fewer stringer ones. This is a radical difference as compared to other games because the cost to enter a hex depends on what needed to be crossed in order to reach the hex’s center. This means that reading the map can produce optimum moves. There are no ASL scenario boards that correlate to streams; therefore the terrain type is simply abstracted into the additional movement cost in trying to find a suitable place to cross. If traveling along a road/railroad, using an operable bridge can negate the cost of fording. When traveling cross-country the extra MF expenditure abstracts finding a suitable place to cross. TOCS WWII streams have no affect on scenarios except for a 1-turn delay before entering the scenario for units that must cross a stream and/or uphill elevation change. Hills played a major part in helping to secure the wireless communications network and extend the transmission distance by having a line-of-sight over obstacles. Likewise, transmitting from a dense jungle with lots of moist vegetation reduced communications distances. This provides one reason why a TOCS WWII commander would want to take hills as an objective. Hills provide other advantages, such as increasing the range of the artillery and providing an ideal location for forward artillery observers to direct artillery strikes and artillery interdiction. This last advantage for height advantage of contour lines provides a limited intelligence gathering capability, by performing one free observation check per unit. The opponent will quickly surmise that the hill is being used for observation purposes. In a double-blind game, knowing that an enemy unit are there is useful, even if it is unclear how many or of what type. The contour line mechanics allow players to look for ways to optimize movement to reduce the COT penalties. Abstracting away the cost to leave the present hex was one way of achieving this. It is assumed that during the 3-hour operational impulse units are not continuously moving but taking breaks performing patrols and scouting. Therefore, only a portion of the 3-hours was actually spent moving. So when the decision was made to move on to the next hex, they are in position to do so. TOCS WWII allows the TOCS WWII Module to embed fixed position facilities that can be tied to victory conditions, such as VPs for which side holds the facility at the end. They can also be used to derive a benefit that can be lost during play. Example:
Airbases allow aircraft to fly more missions (by negating the ‘in flight’ segment) but are vulnerable. Ports and railhead can be used as a means of bringing in units and supplies, or evacuation. Supply depots can have their contents distributed to other supply bases/depots/dumps at the cost of OPs to move them. In general, fixed facilities present the commander with a reason to defend in order to protect the formations supporting infrastructure.The military use of railroads and trains was vital to cover large distances with reinforcements and supplies, as well as performing strategic relocation of units. In TOCS WWII the game, designer’s can utilize railroads as they were intended. This creates new logistical concerns for the TOCS WWII field commander and their ability to protect and repair these vital arteries. The Replacement/Motor Pool allows the Game Module to feed in replacements during play as well as liberated POWs. Whereas the Hospital and Field Repair facilities are local facilities that can patch up men and vehicles injured or damaged in battle, although it may take longer to successfully refit when relying on them. Having the weather change every Operational Impulse means that Commanding Officers can’t make decisions based on what the weather is now, but what it might be later. There is a higher probability that the weather will remain the same, but also the probability that it may increase or decrease. This unpredictability simulates intermittent squalls and random thunderstorms, and shifting fog. The TOCS WWII system allows defending AA units to fire on all air mission types, allowing players to set up an air defense network. Units can assist in the defense of adjacent hexes by warding off attacking aircraft performing ground strikes, ground support, aerial reconnaissance and other types of missions. Likewise they can be used to ward off supply drops, paratroop/glider landings and bombing missions. Examples of friendly fire caused by aircraft were common enough that great care is required for mission coordination. This rule forces Commanding Officers to consider the consequences for calling in attack missions during a rapidly changing situation. Bombing and carpet-bombing are pretty indiscriminate as to what they are hitting. This tactic was developed for the breakout during Operation Cobra and was widely used for the rest of the war. Tactical aircraft were assigned to specific Army units with the specific role to scout the roads and coordinate in any battles with the units on the ground. As one aircraft returned to base, another was dispatched to be on-station to continue the aerial over watch. This tactic helped during the breakout as well as the race across France. Aerial Ground Strikes allow targeting specific target types, such as focusing on hitting ammo dumps, or knocking out communications facilities, or damaging rail lines. Unlike bombing missions that are indiscriminate in what they hit (like area fire), the ground strike has a specific purpose. The random selection adds the probably of getting lucky and getting several for the price of one. Due to the initial confusion during an airborne operation, all artillery support in unavailable until the beginning of the 2nd friendly impulse. This includes artillery that had previously landed. Paratroopers that have just landed and are organizing cannot exert ZOC until the 2nd friendly Impulse, unlike gliders that can immediately exert ZOC. TOCS WWII illustrates the importance of aircraft for locating and attacking submarines by allowing them an attack during each Operational Impulse that aircraft perform Patrol Mission; whereas, Surface ships can perform ASW only during the end of the Operational Game Turn. Subs attack last during the Operational Game Turn. Most war games abstract combat between attacker and defender to occur across the hex side between hexes, with the result that one or the other might be forced out of the hex. In TOCS WWII combat occurs within the enemy occupied hex being attacked. TOCS WWII is upfront and personal, as it should be. This illustrates the flexibility of artillery to be called in on demand, as compared to a planned fire mission to bombard or target specific areas within the attack zone. Artillery OBA/NOBA called in during combat do not cause the asset/battery to degrade, whereas Bombardments and Artillery Ground Strikes cost OPs, can only be performed by Batteries and the battery will degrade after the fire mission, hence the ½ firepower, X1 and X2 differentials. Aerial Tactical Ground Support missions qualify for a shift as well as a Combined Arms shift, illustrating the importance of close in air/ground support. With only one adjacent enemy owned hex, the defender gains a bonus due to having to defend a limited front; therefore, he can consolidate all forces to cover this shortened front line. This tactical ability allows key hexes to be held regardless of losses. Likewise, it also allows a fighting withdrawal by limiting losses by converting them into hexes retreated, at the downside of the units degrading. The concept of pursuits allows attacking units to stay in close proximity (ZOC) of a retreating enemy, or to pin the retreating units in an engagement battle. Likewise exploitation allows an attacker to follow a retreating enemy into the first hex and strikeout into different hexes. During this pursuit/exploitation all ZOC/EZOC is suspended allowing units to slip through unoccupied hexes. Units that exploit but encounter and enemy occupied hex will be bumped back into the previous hex.